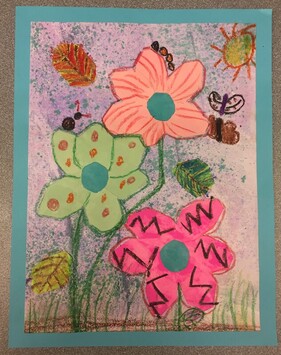
Original Works Project: Flower Gardens
Learning Target: I can use proper scissor techniques and paint with chalk to create a flower garden
|
|
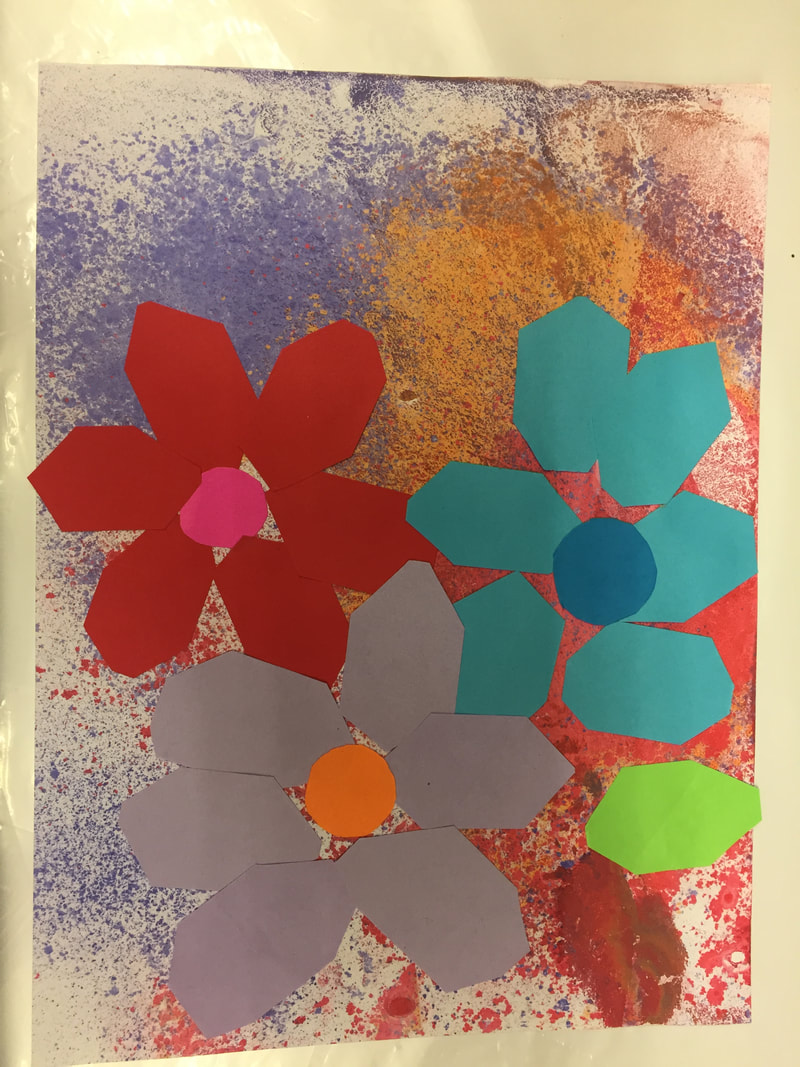
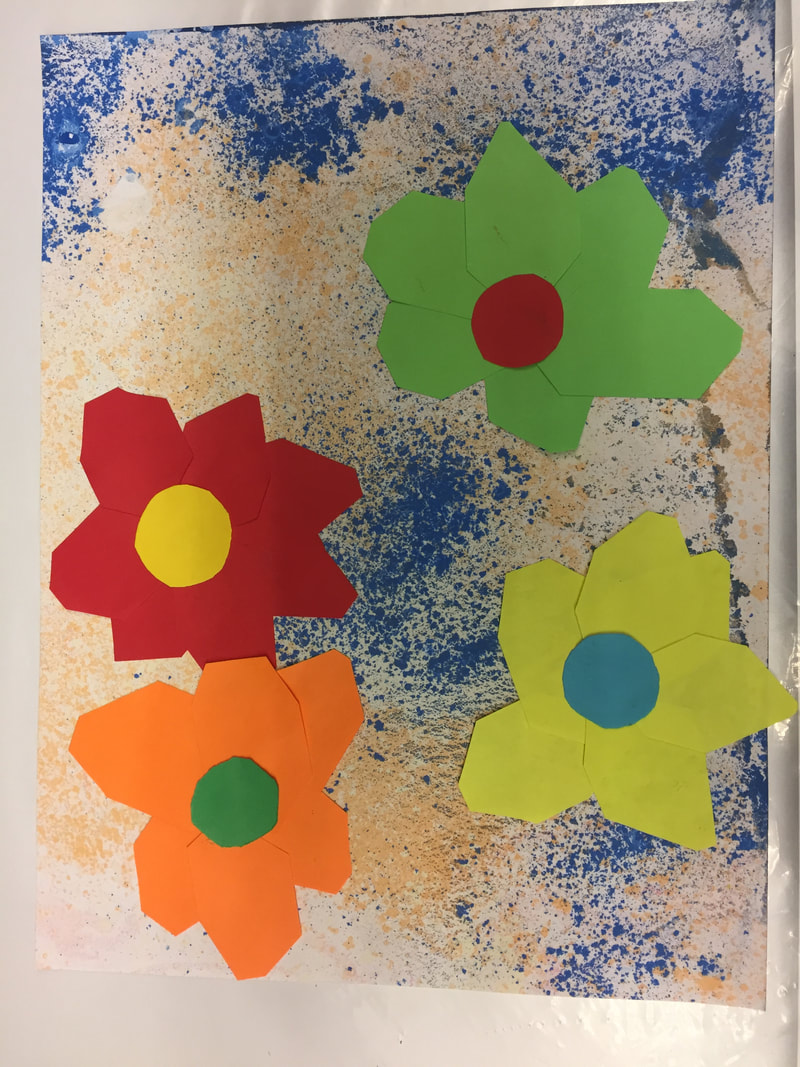
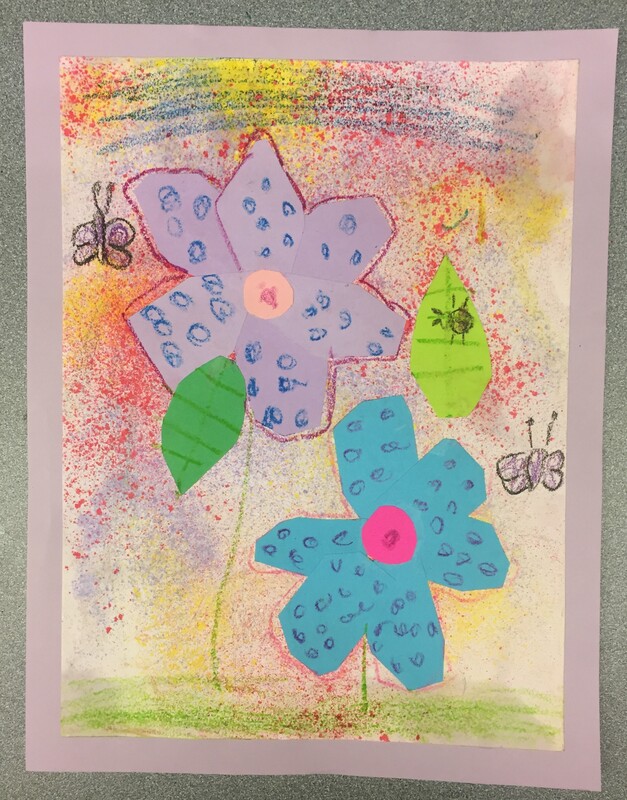
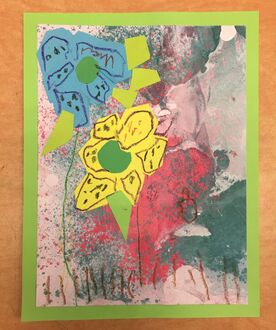
FIRST CLASS: Students began by creating chalk paintings for their flower garden background. Using shaved chalk, students sprinkled their choice of colors into a bucket with shallow water and dipped their paper onto the surface to 'paint' their paper with the floating chalk. They really enjoyed this process, and created some very interesting and colorful backgrounds using the chalk! While students completed their backgrounds at our demonstration station with Mrs. Bello, those waiting began choosing their flower petal colors and practiced their cutting skills by cutting small rectangles into rounded petal shapes. |


|
SECOND CLASS: Next students arranged and glued down their petals to their background in the shape of a flower. We talked about complimentary colors and how they 'pop' when next to each other. The students then used this to pick circles for the middle of their flowers that would stand out from their petal colors. Some students also glued down leaves they cut around their flowers. |
|
|

|
|
THIRD AND FORTH CLASS: For the last steps of this project, the students discussed how we could decorate our flower gardens by adding patterns and other details. Students brainstormed about what we could draw in to add more detail to their artwork using crayon. They talked about decorating their petals with different kinds of lines or shapes. We also added stems and grass for our flowers and they came up with other ideas such as lady bugs, butterflies, and a sun that could be drawn in. After demonstrating several of their ideas about what they could add to their picture, the students were excited to create their own flower garden scenes. For the final step, students chose what background color they wanted their flower garden mounted on to add another pop of color! |
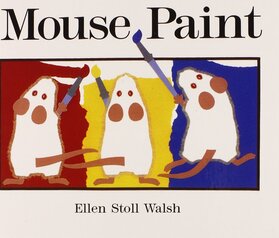
Mouse Paint
Learning Target: I can mix primary colors to create secondary colors
|
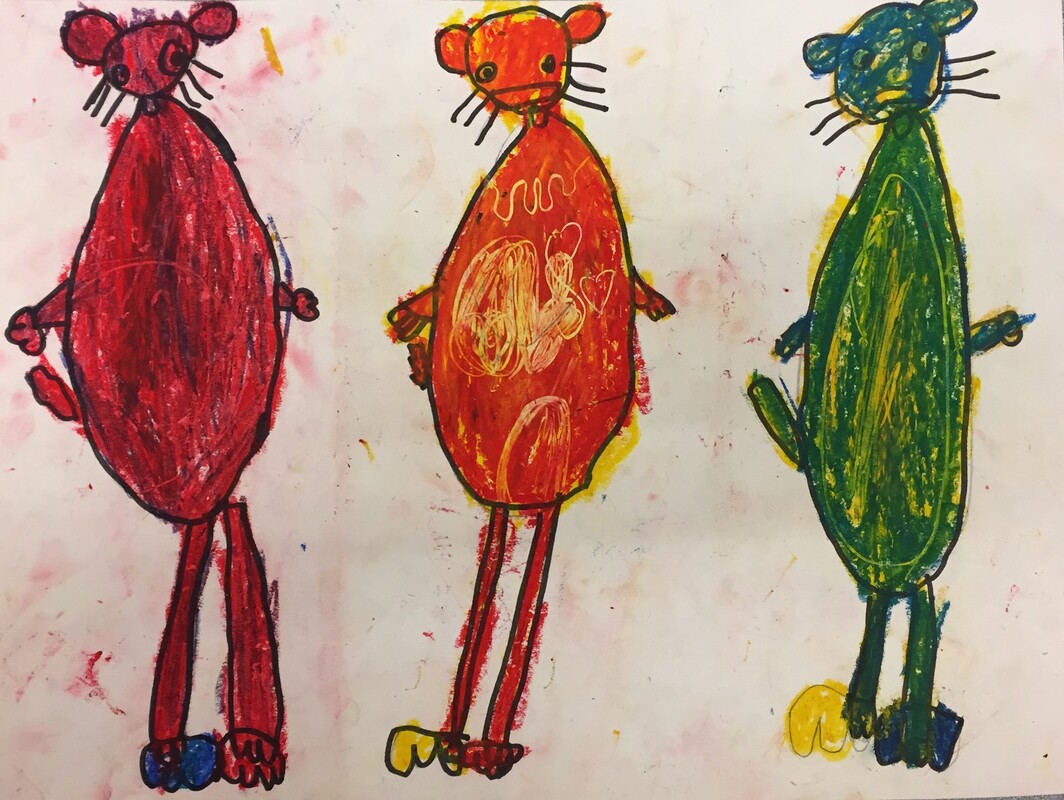
First Class: For this project we read the book Mouse Paint by Ellen Stoll Walsh. While reading the story Ms. Bello used our 'magical mice' who like the story, jumped into different cans of paint and demonstrated what happened when mixing primary colors! The students followed along and helped guess what colors the mice would make by jumping into the different colors of paint cans! After the story, we used step by step demonstration and talked about the different shapes we could use to draw our three mice. |


|
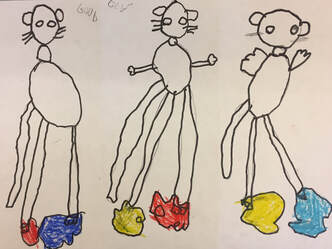
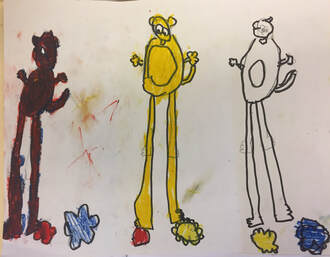
Second Class:
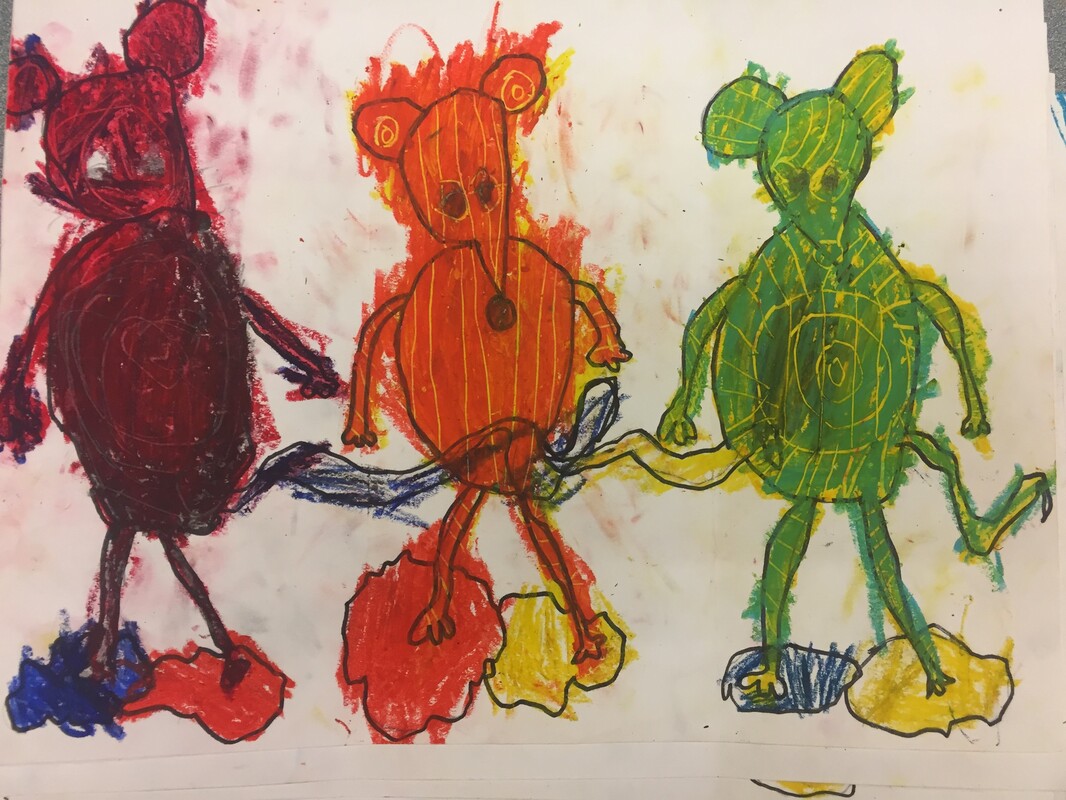
For the second class, we outlined our mice and revisited what colors were made when different primary color are mixed together. the students then colored our paint puddles using oil pastels and began mixing the two primary colors of the puddles to show what secondary color was created. |
|
|
|
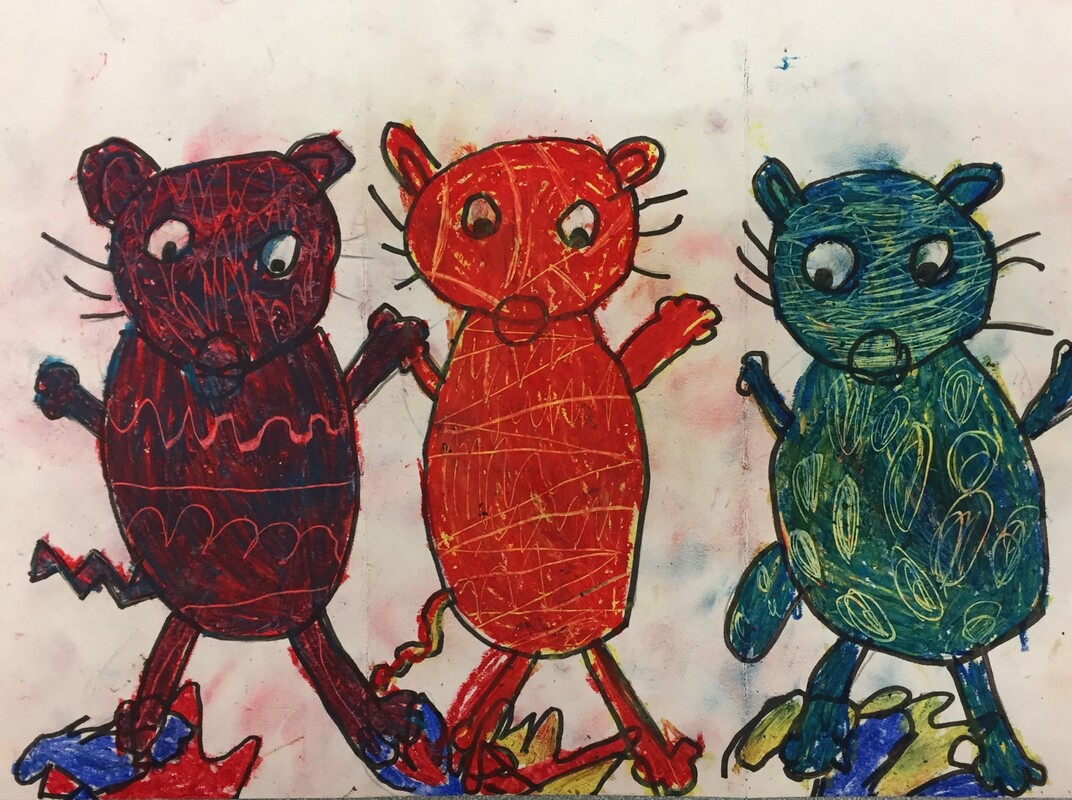
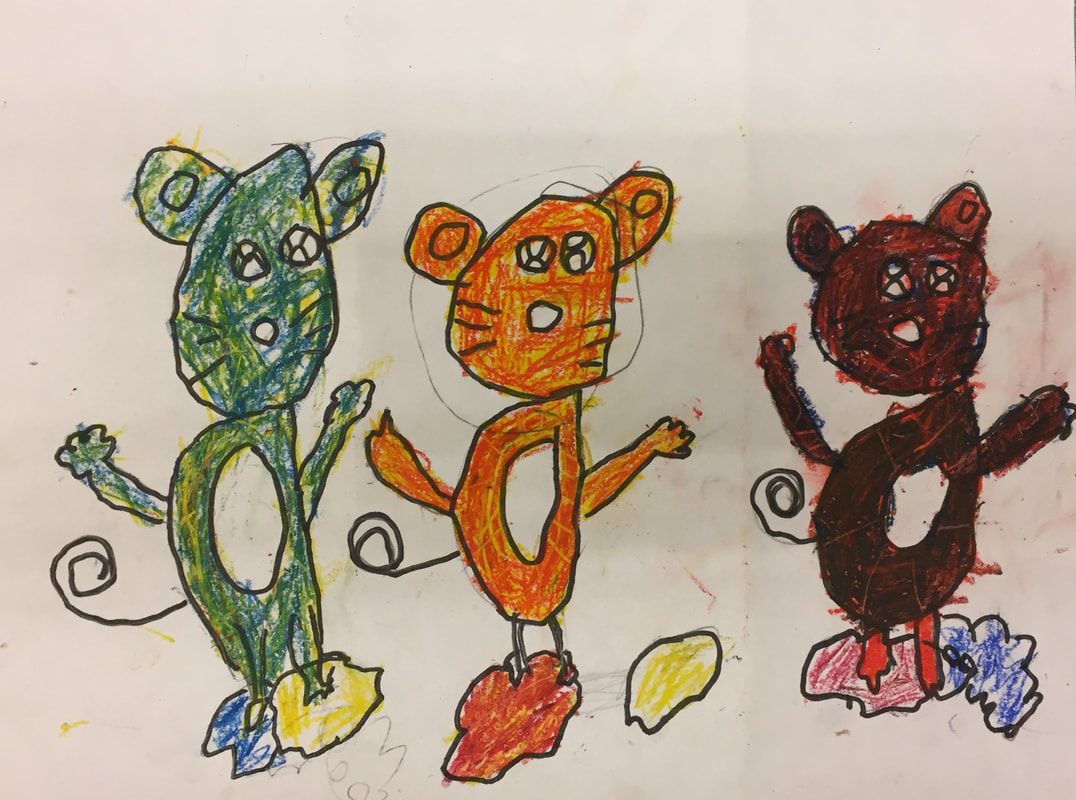
Third and Fourth Class: For the third and fourth class students continued to mix and overlap the two colors of each mouse's puddles to make their secondary color. If students finished, they were given a wood tool to scratch back into the oil pastels and add patterns and details to their mice. During our classes students learned and loved to sing the Primary Colors song by OK Go. Check out the video by clicking below! PRIMARY COLOR SONG |
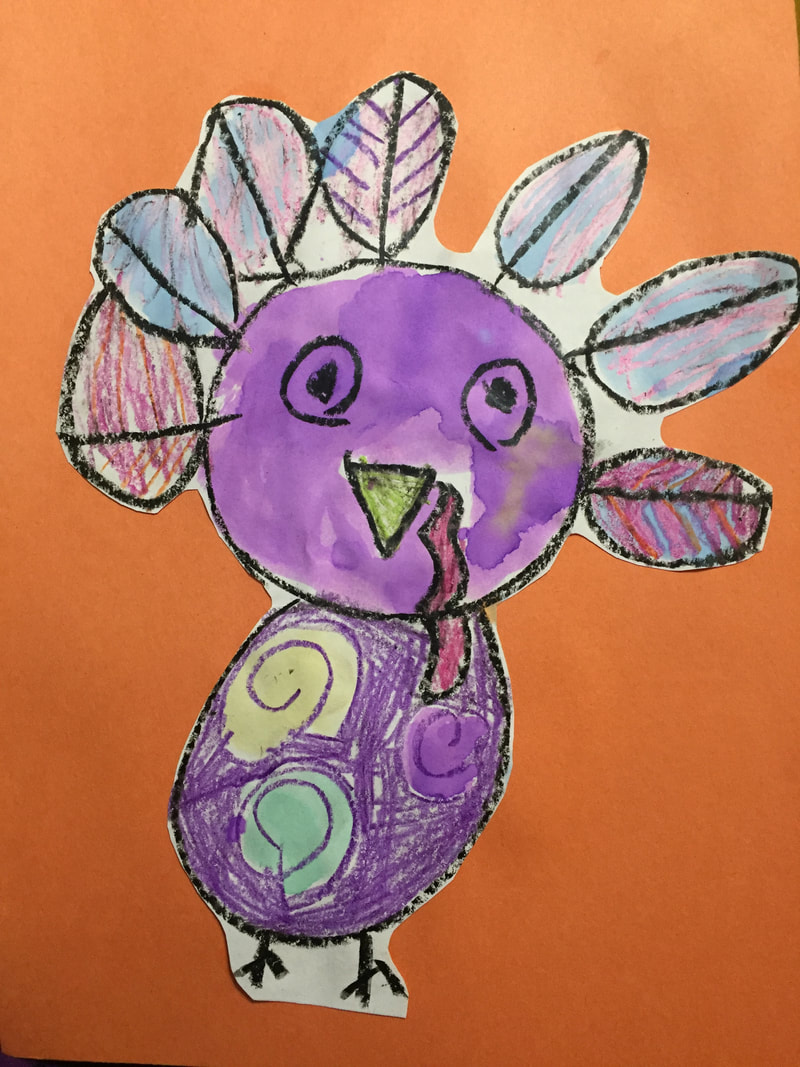
Thanksgiving Turkeys
Learning Target: I can use crayon and watercolor to create a thanksgiving turkey
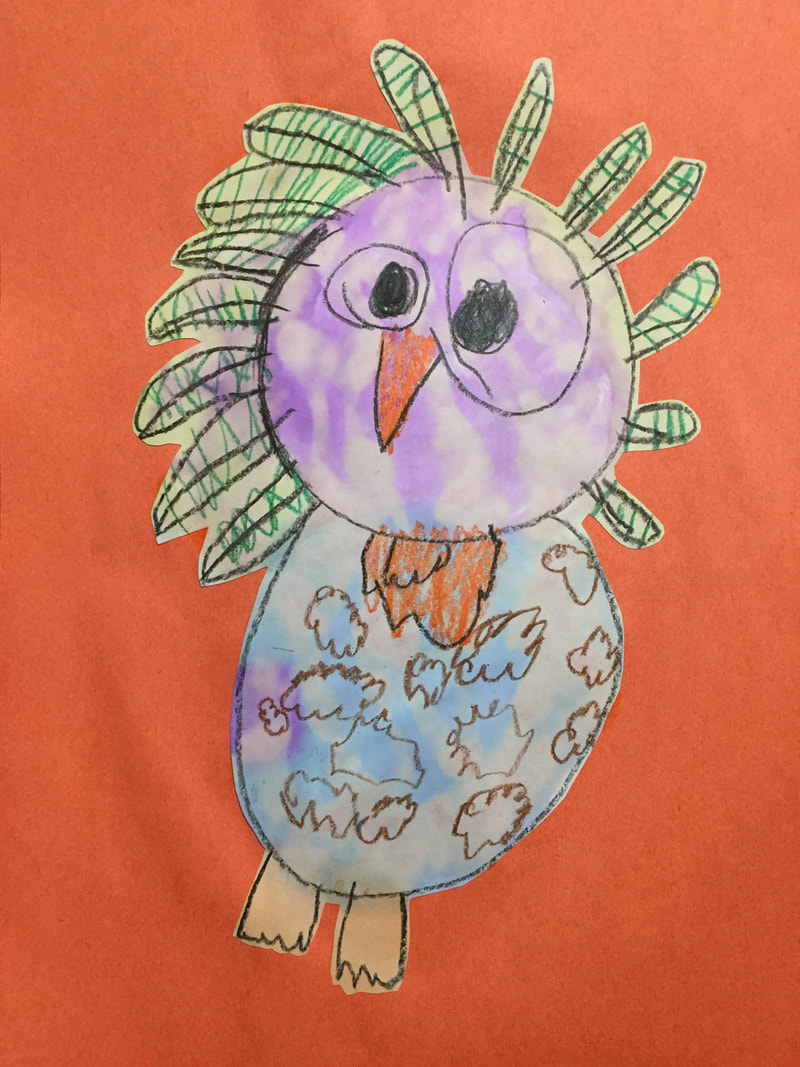
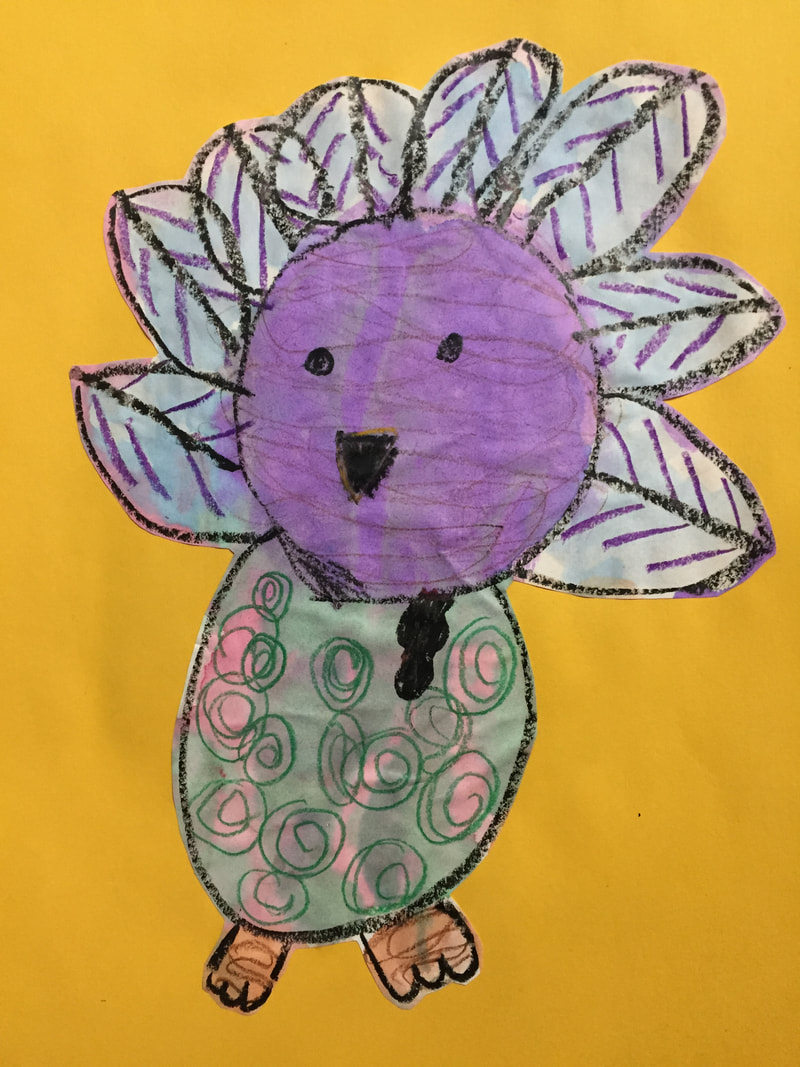
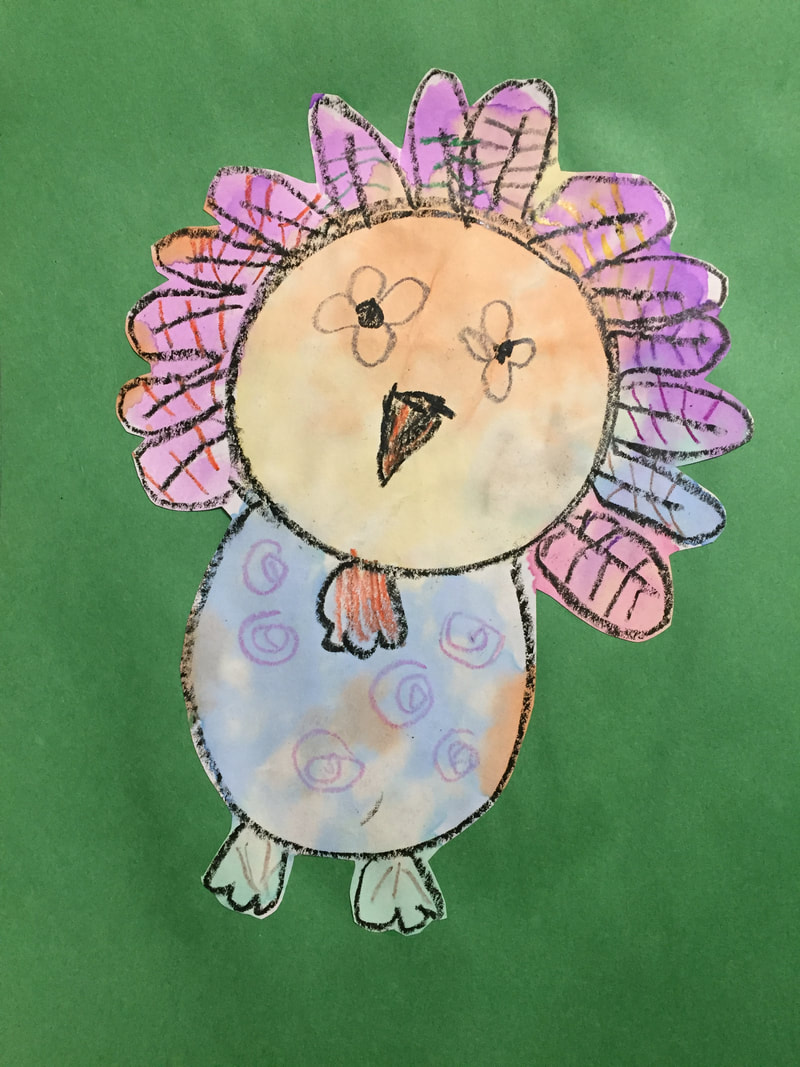
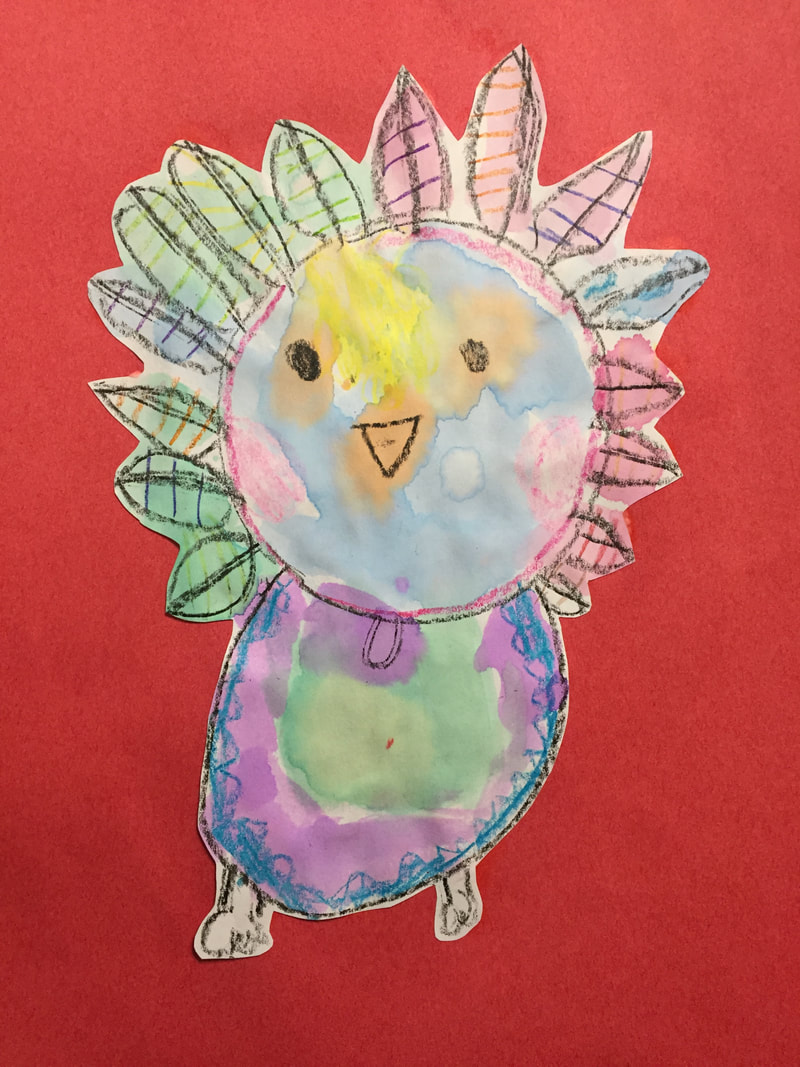
The Kindergartners helped to make decorations for Timnath's Thanksgiving feast. In this speedy one day lesson, the kindergartners jumped right into drawing our turkeys with a step by step demonstration. Next they added feathers and used crayons to add details to their turkeys. For the last half of the class, the students used watercolors and got to explore how crayons and watercolors react creating a resist. Each turkey turned out colorful and unique and the kindergartners had a good time creating them!
|
|
|
|
|
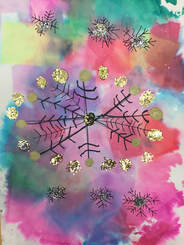
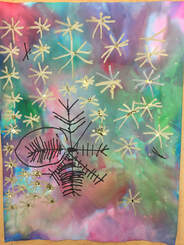
Tissue Paper Painting Snowflakes
Learning Target: I can paint with tissue paper and use lines and shapes to create my own snowflakes
|
First Class:
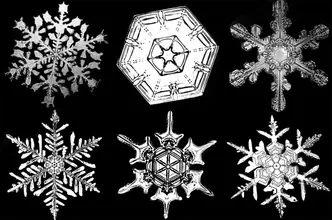
To begin this project, the kindergartners discussed what they knew about snowflakes. We started by watching a timelapse of snowflakes forming and looked at the different lines and shapes that made up each snowflake. Students observed how each was different. To view the timelapse, click below. TIMELAPSE OF SNOWFLAKES FORMING After watching the timelapse, we looked at how to start our snowflake using lines that crossed and then how each snowflake could be decorated by adding more lines or different shapes. |
|
|
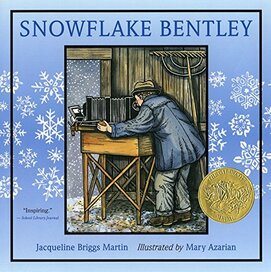
Second Class: Students watched a portion of a read aloud of the book Snowflake Bentley. They learned about him and how he was the first to really observe closely and document snowflakes. After the story, students were told we would be painting with tissue paper! They were shown a quick demo, and then able to choose different colors of tissue paper and were instructed to cover up their snowflake and paper with overlapping tissue paper. Once they had their whole page covered, their paper was sprayed with water and they could watch their tissue paper begin to bleed and blend the colors together. |
|
|
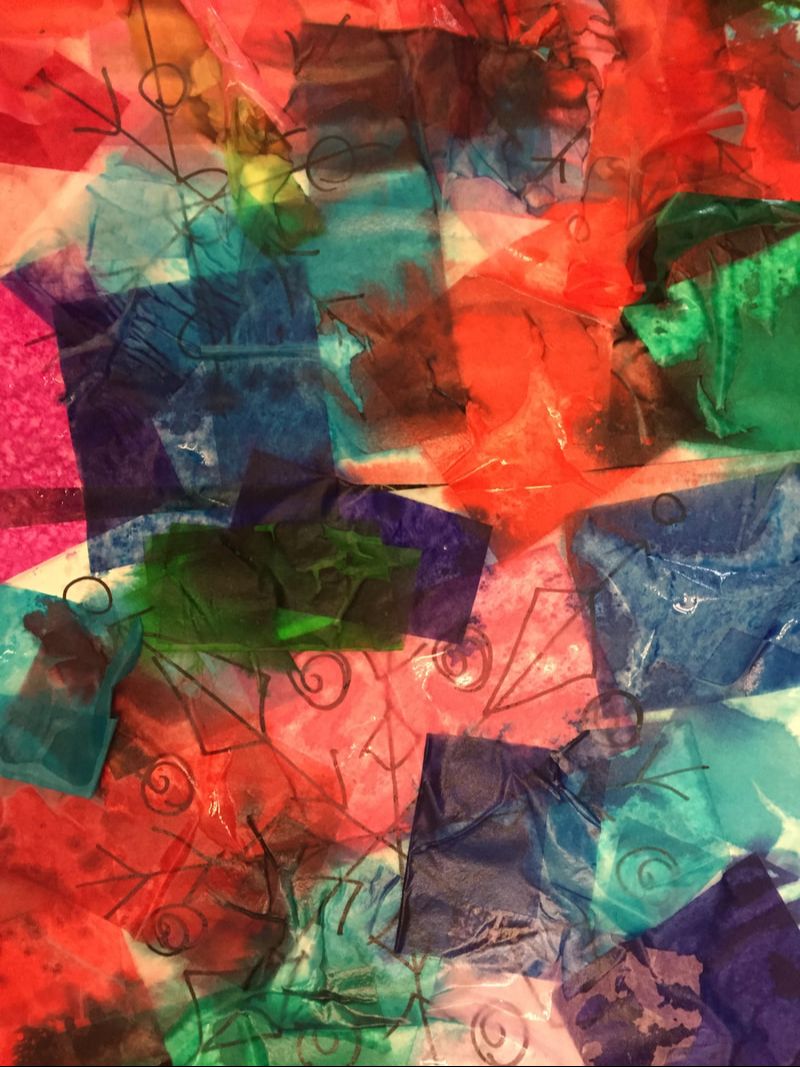
Third Class: After the tissue paper paintings were dried, the tissue paper was removed, and the students were able to see how the color bled and stained their snowflake drawings. For their final touches, they were able to use gold and silver pens to add any more details to their snowflakes. They even had the opportunity to add some gold or silver glitter to their snowflakes to make them sparkle! |

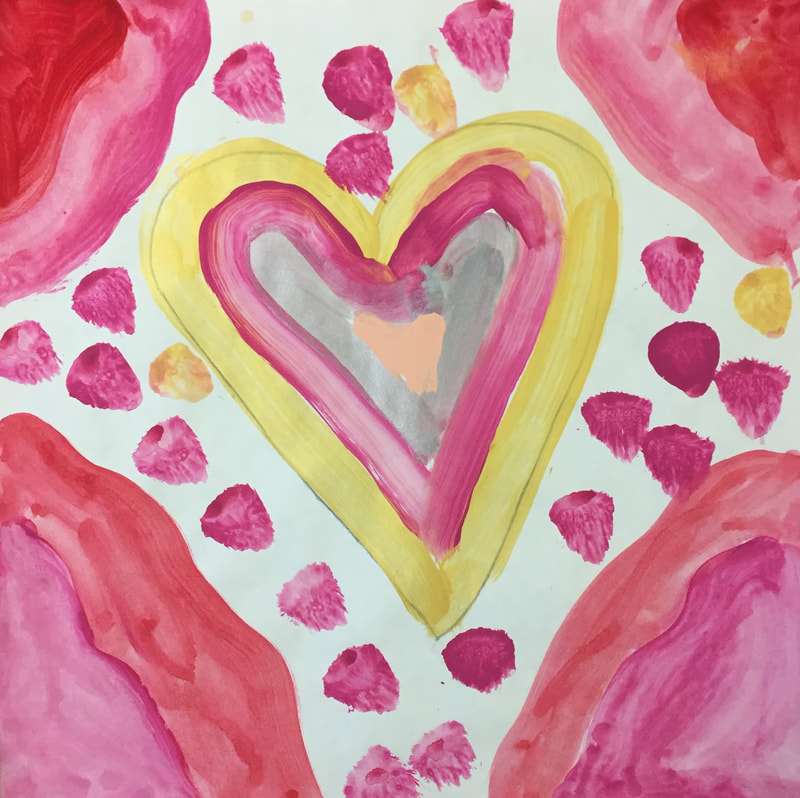
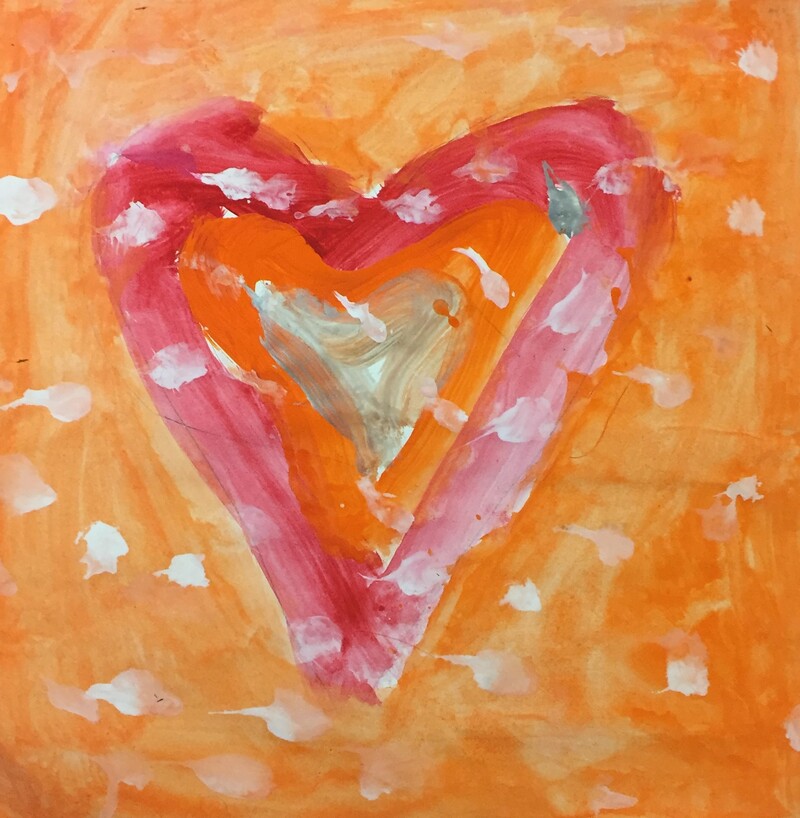
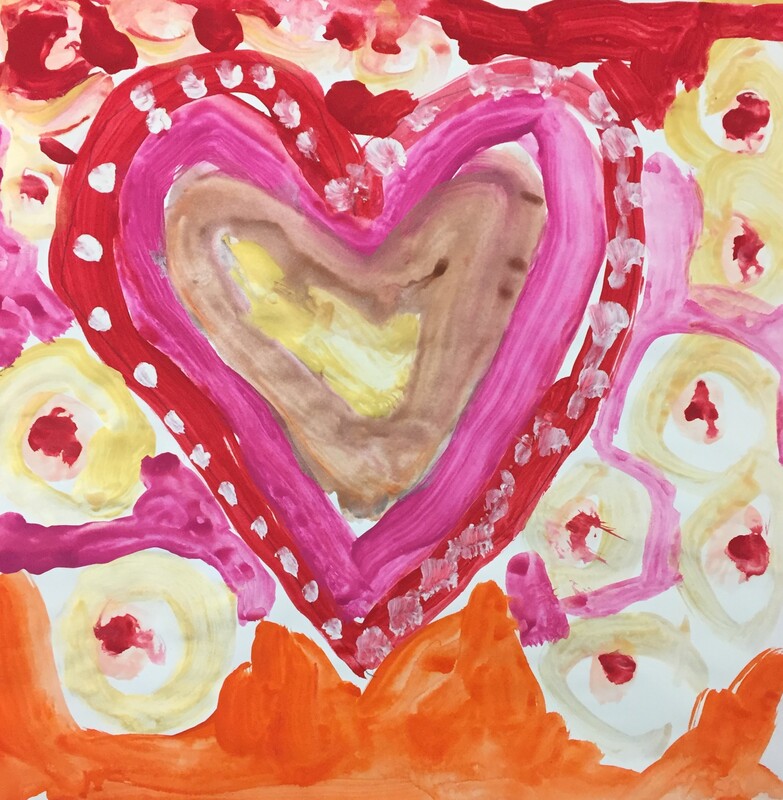
Valentine's Day Heart Paintings
Learning Target: I can paint a heart and decorate it using and blending multiple colors
For this one day lesson during the week of Valentine's Day, students got to play with creating hearts on large scale paper. They were shown how to first draw a heart and then add colors and try to blend the colors together by overlapping colors in certain areas. Students were able to add details, or other decorations to their heart paintings as well!
|
|

|
|
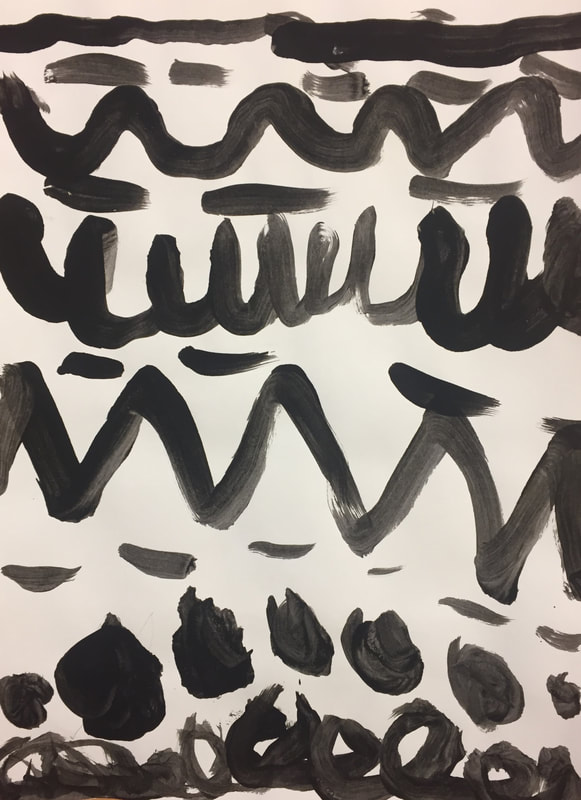
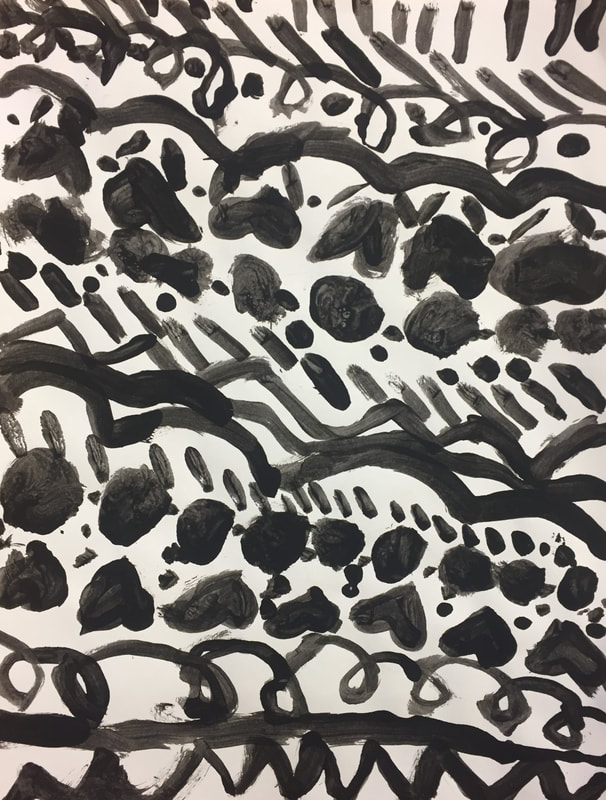
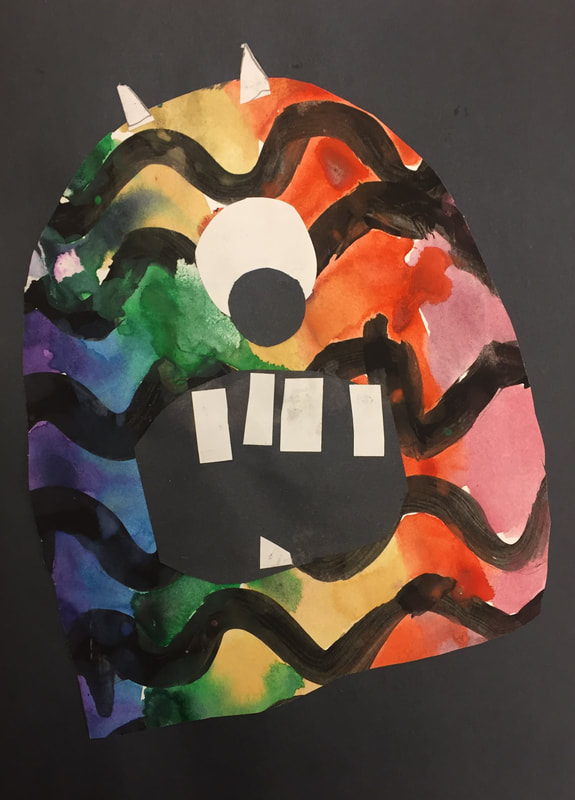
Line Monsters
Learning Target: I can create a variety of lines, and cut and add shapes to create a line monster!
|

|
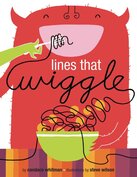
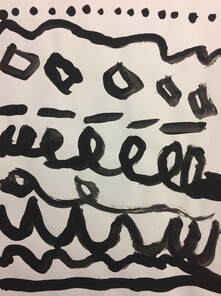
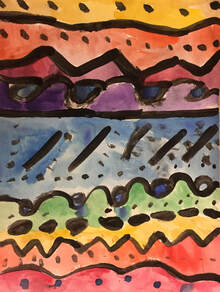
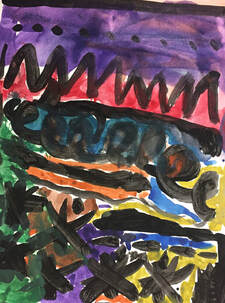
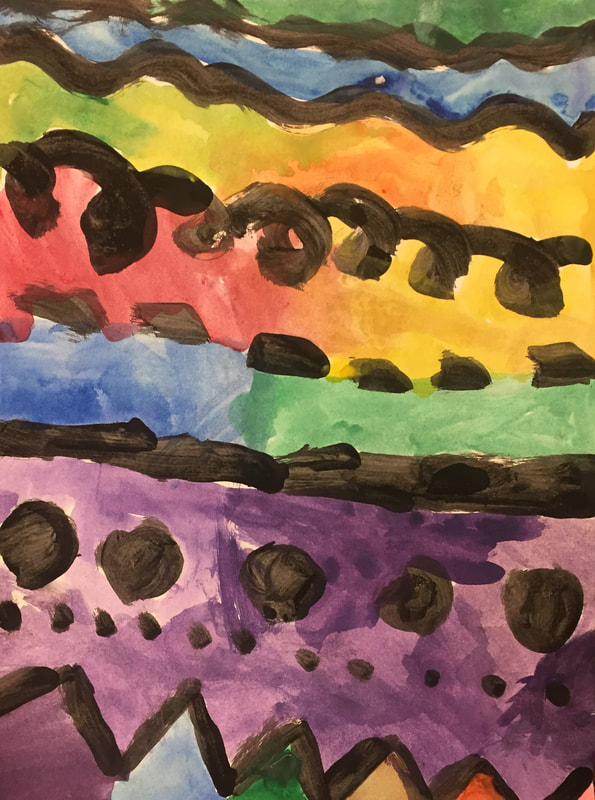
First Class: To start this lesson, the kindergartners read the book called Lines That Wiggle, by Candace Whitman. We looked at the many different kinds of lines illustrated in the story. After the story, students observed where they saw lines around the room, looking at the walls, floor, even each others clothing. After the story, each student was given a piece of white paper, a paintbrush, and black paint. They were asked to fill their white paper with as many different kinds of lines they could think of. It was great to see them sharing ideas and coming up with zig zag, curly, straight, broken, and many more ideas for their lines! |
|
Second Class: For the next step of the kindergartners' line monster project, they were able to paint their white paper using watercolors. We talked about being careful not to paint on the black lines they painted last class and instead to work slowly and carefully to paint around the lines to fill the spaces with color. While painting, students explored all the different watercolors and enjoyed mixing their paints in some areas, or coloring each section using different colors. |
|

|
|
|
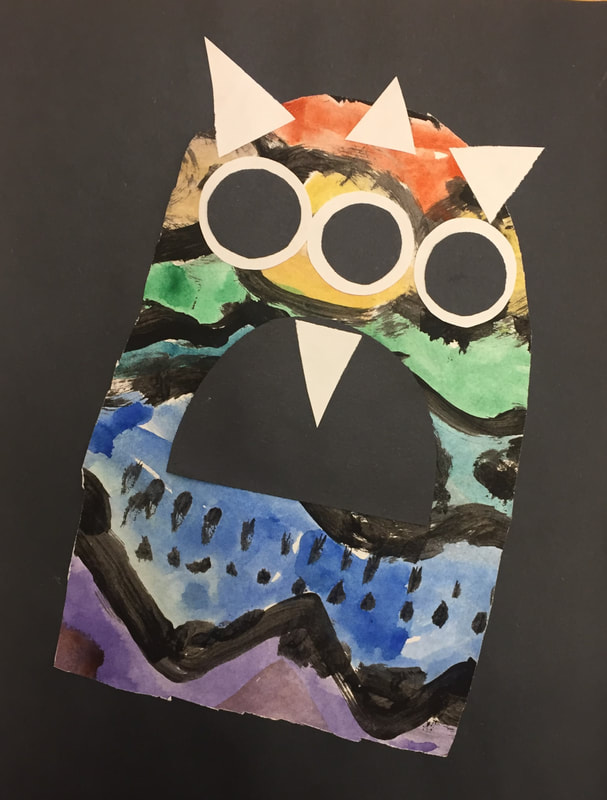
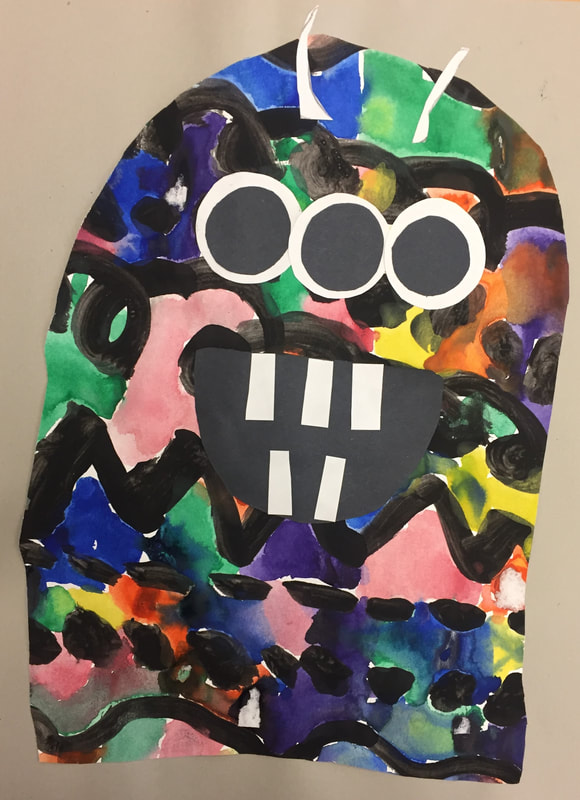
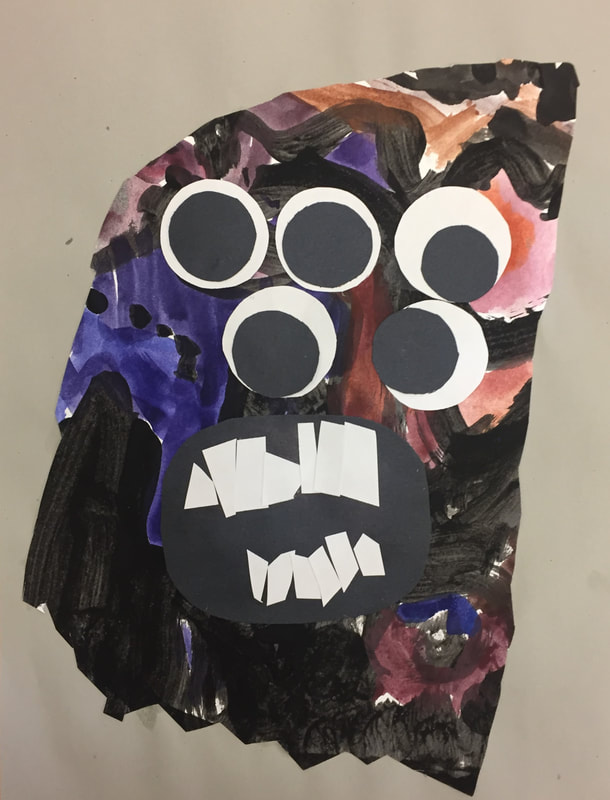
Third Class: For the final class, the students got to cut out their line monster. They drew on the back what shape they wanted their monster to be and then cut the shape from their painting. After cutting out their monster body, the kinders were able to pick out different features for their monsters. Pre cut circles for eyes and mouth shapes were available for them to choose from. Students also used skinny rectangle pieces to cut out their monster teeth and any horns or other details they wanted to include. |
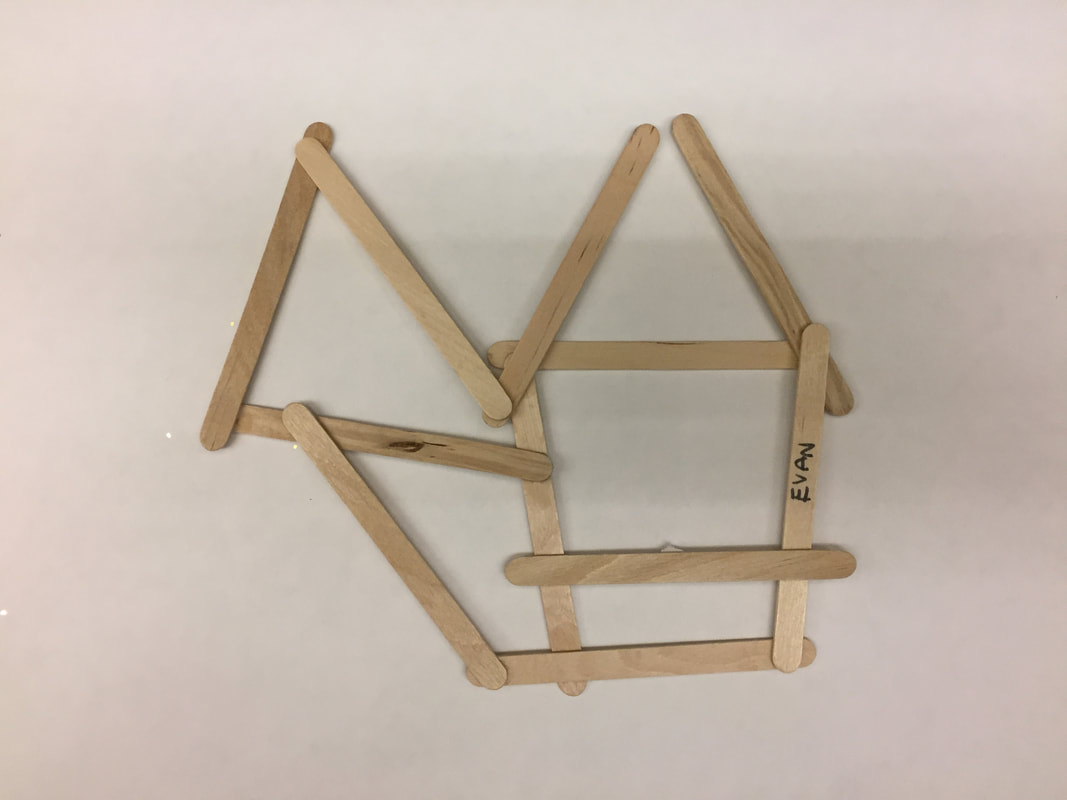
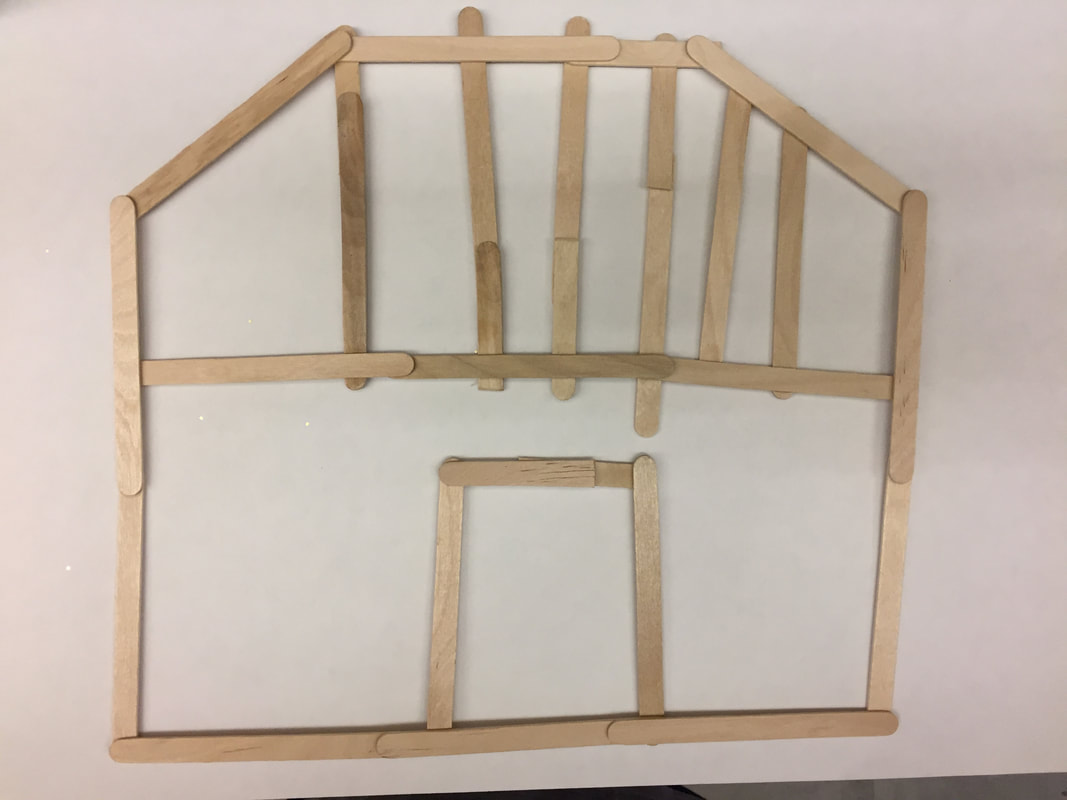
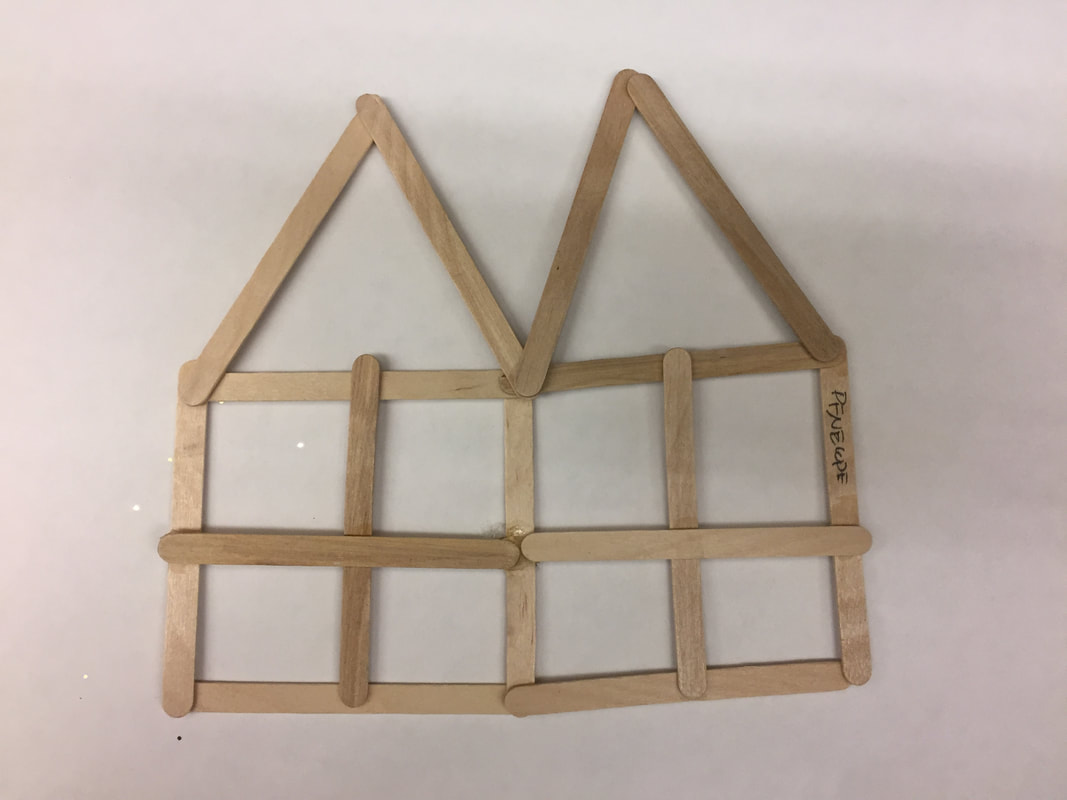
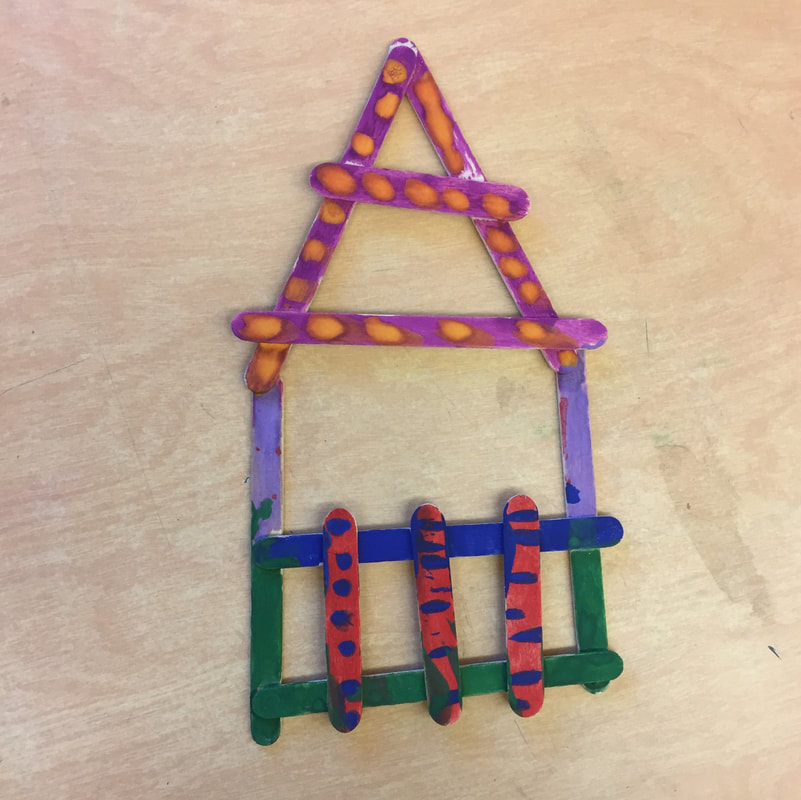
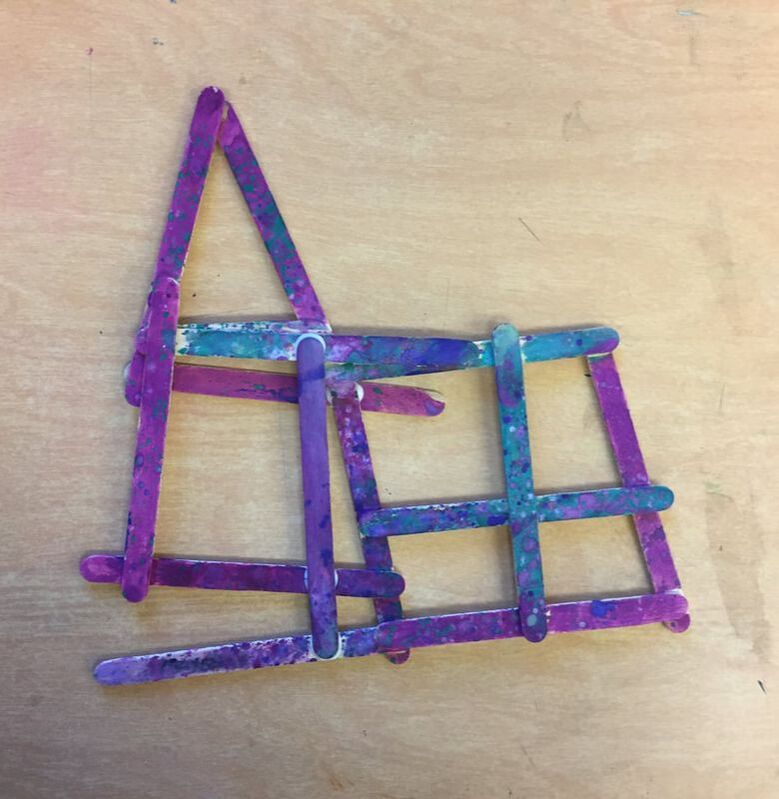
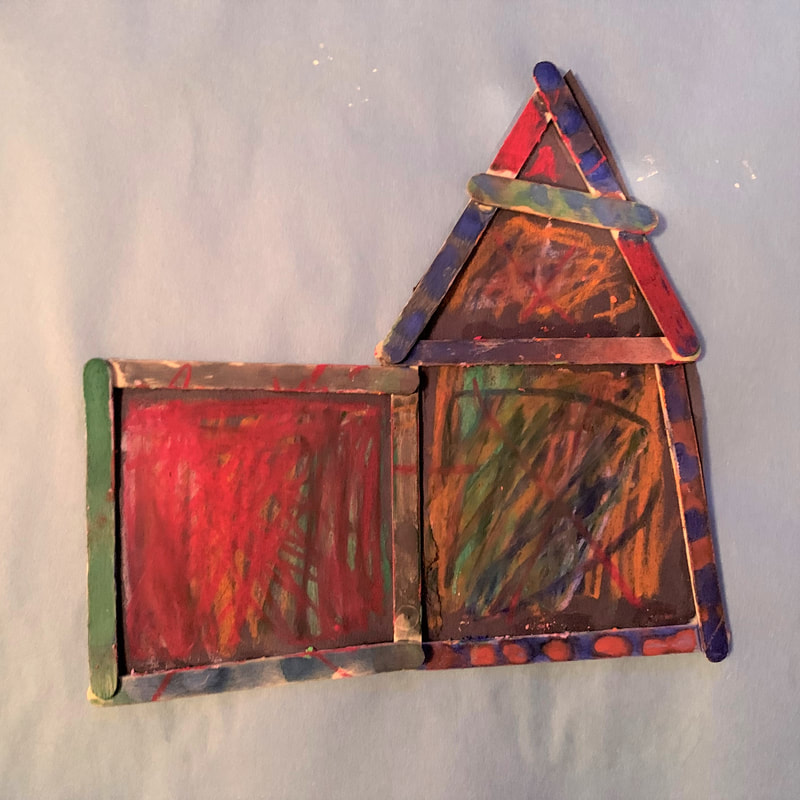
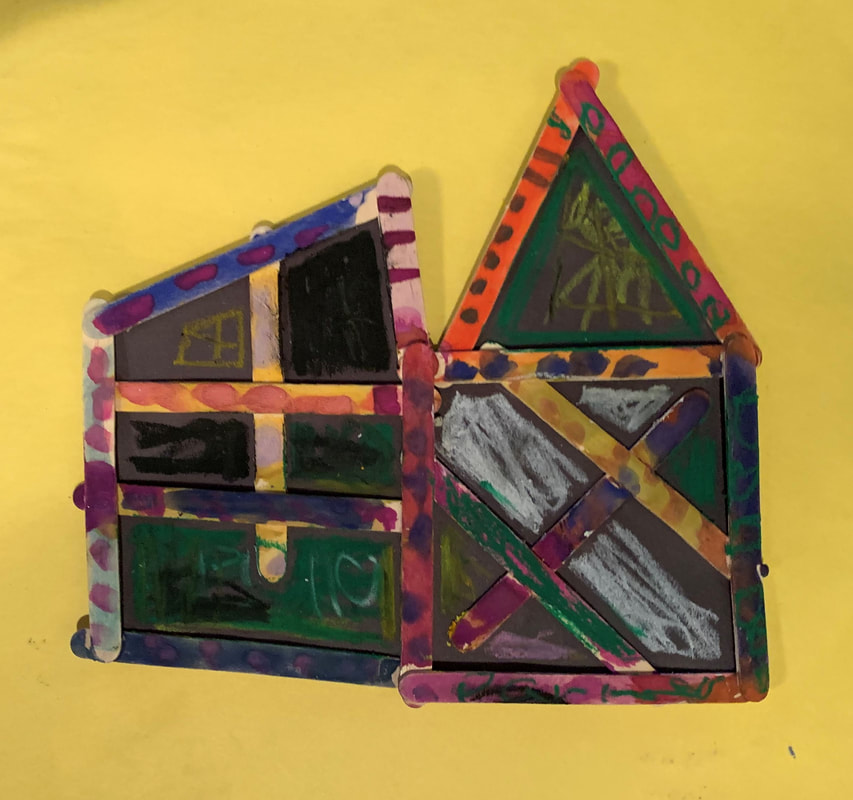
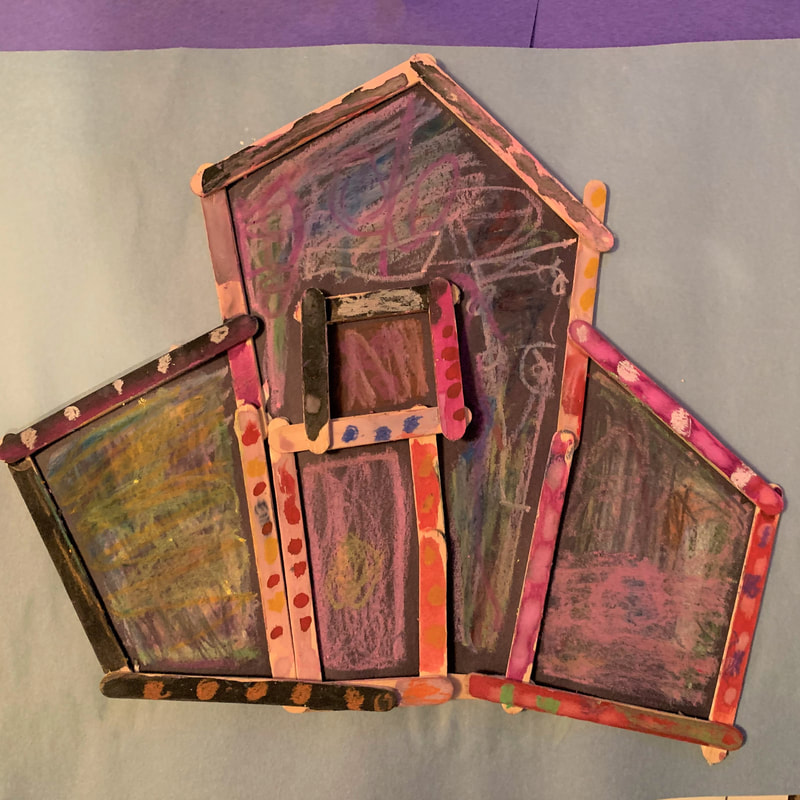
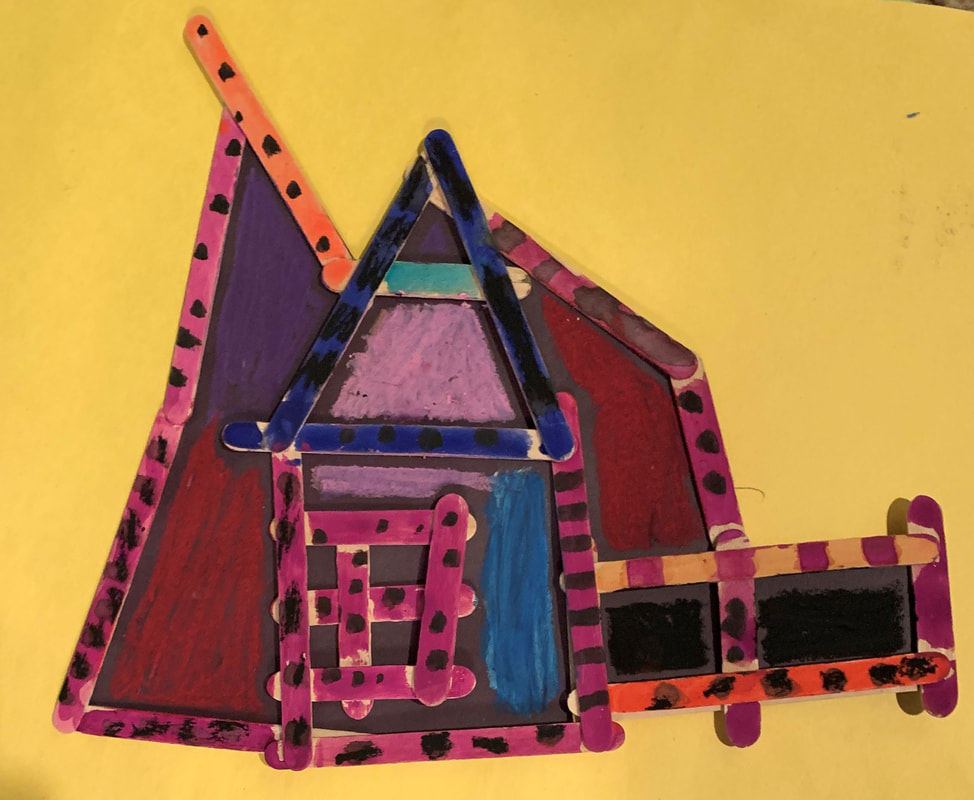
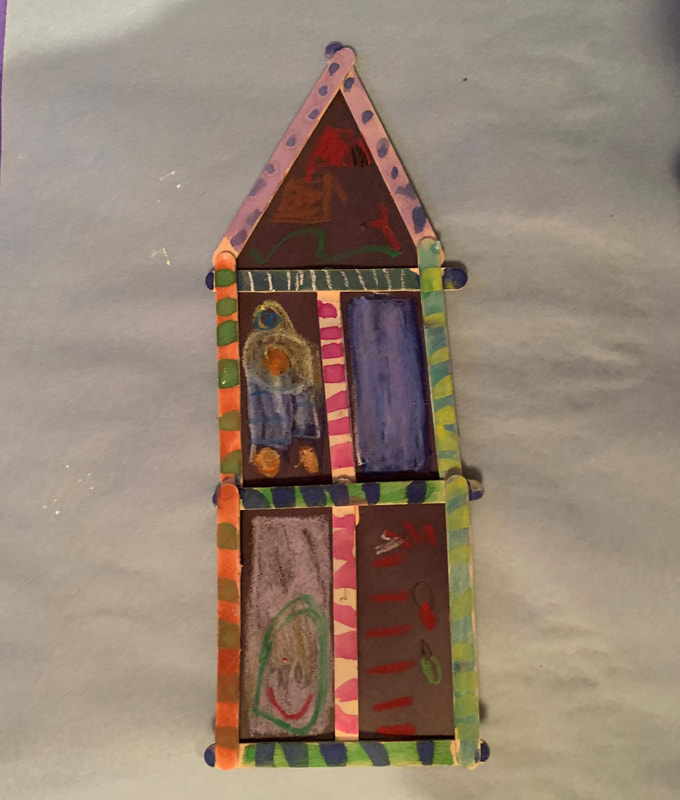
Popsicle Stick Structures
LT: I can create and decorate a structure using popsicle sticks
|
First Class:
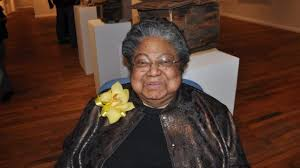
We started this lesson by looking at our influential artist Beverly Buchanan. She explores southern architecture in her work and her art can be found in many museums. Buchanan found her calling as an artist after realizing that she wanted to express the images, stories, and architecture of her African American childhood |
|
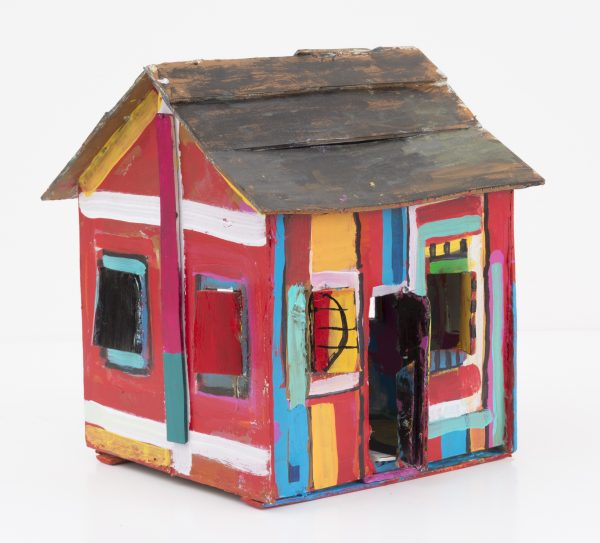
Students began by building their own popsicle stick structures. They started by laying out their popsicle sticks and playing with different arrangements. Once they were happy with their structure they glued the popsicle sticks together.
|
|
|
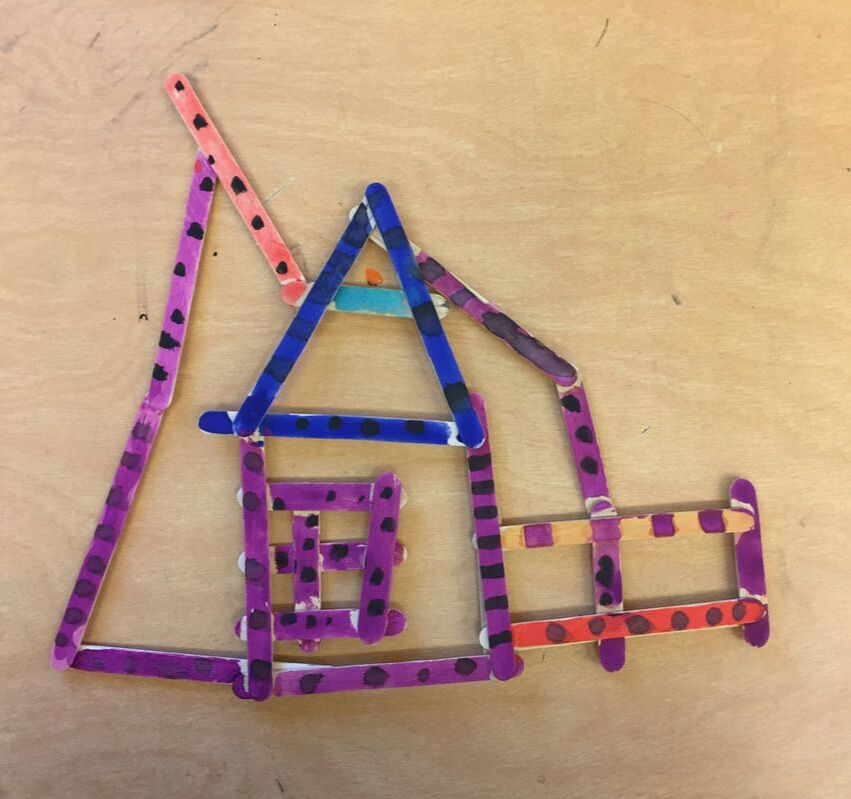
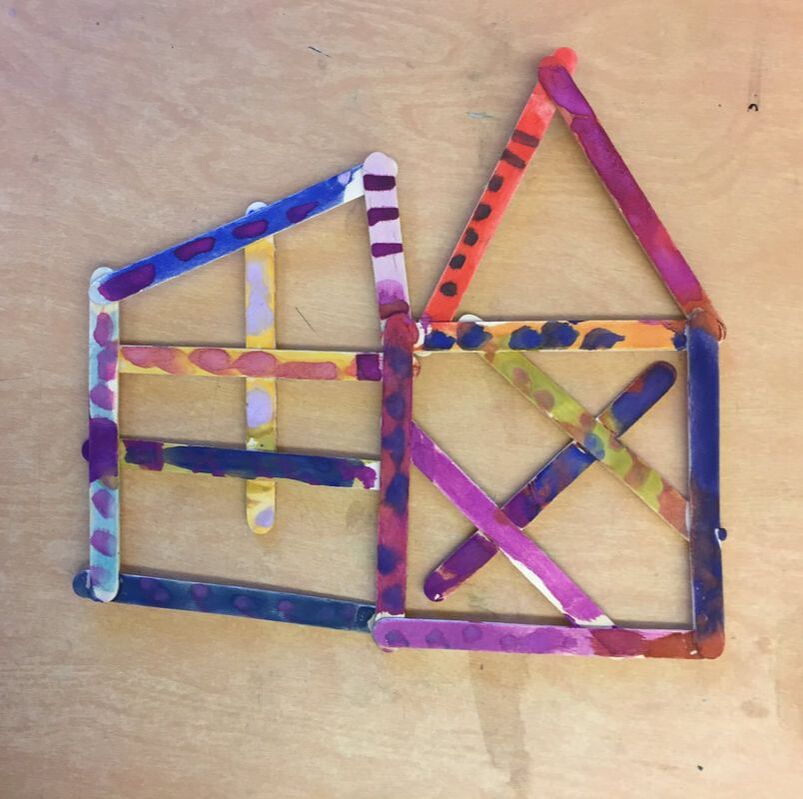
Second Class:
Next students were able to add some color! We revisited Buchanan's artwork and looked at how she incorporated color into her images. After a quick demo, the students used tempera cakes to make their popsicle sticks more interesting and added whatever colors they liked. They could also layer colors and add patterns on top since the tempera cakes dry quickly.
Next students were able to add some color! We revisited Buchanan's artwork and looked at how she incorporated color into her images. After a quick demo, the students used tempera cakes to make their popsicle sticks more interesting and added whatever colors they liked. They could also layer colors and add patterns on top since the tempera cakes dry quickly.
|
|
|
|
Third Class:
For the final class, we read the book Come Over To My House by Dr. Seuss and looked at what some different houses look like. After the students got their structures back with black paper glued on the back and were then able to decorate the spaces and windows in between their popsicle sticks using oil pastels.
For the final class, we read the book Come Over To My House by Dr. Seuss and looked at what some different houses look like. After the students got their structures back with black paper glued on the back and were then able to decorate the spaces and windows in between their popsicle sticks using oil pastels.
|
|
|
|
|
