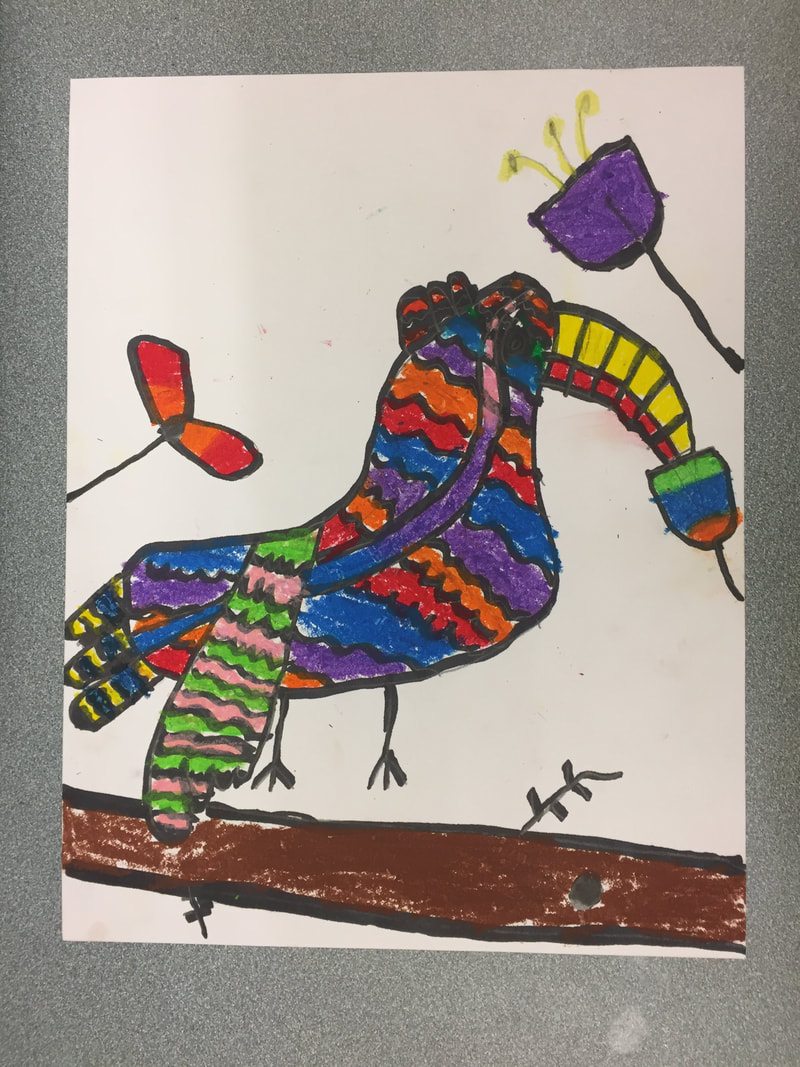
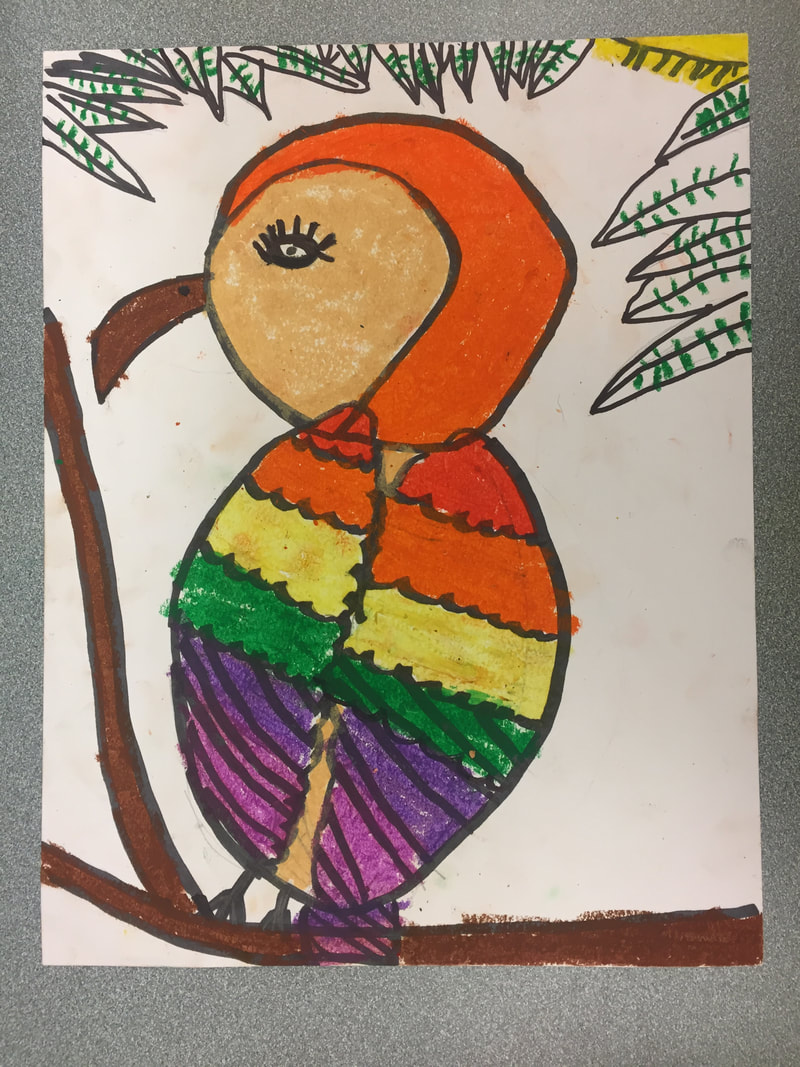
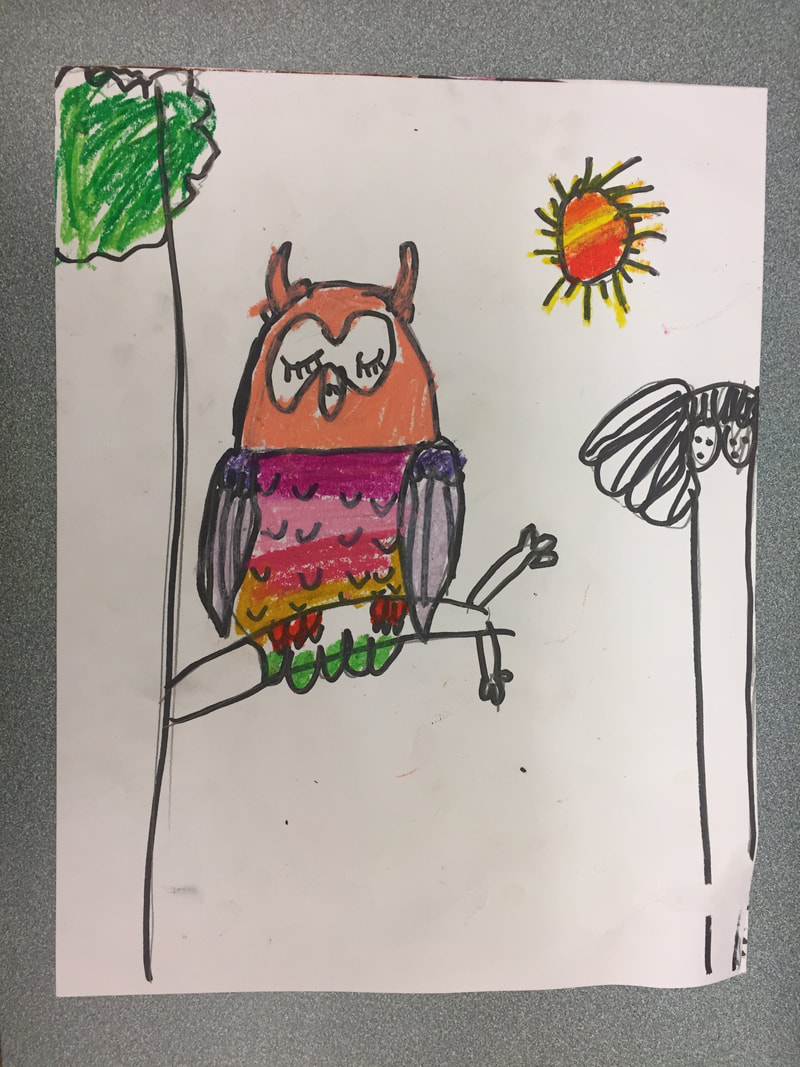
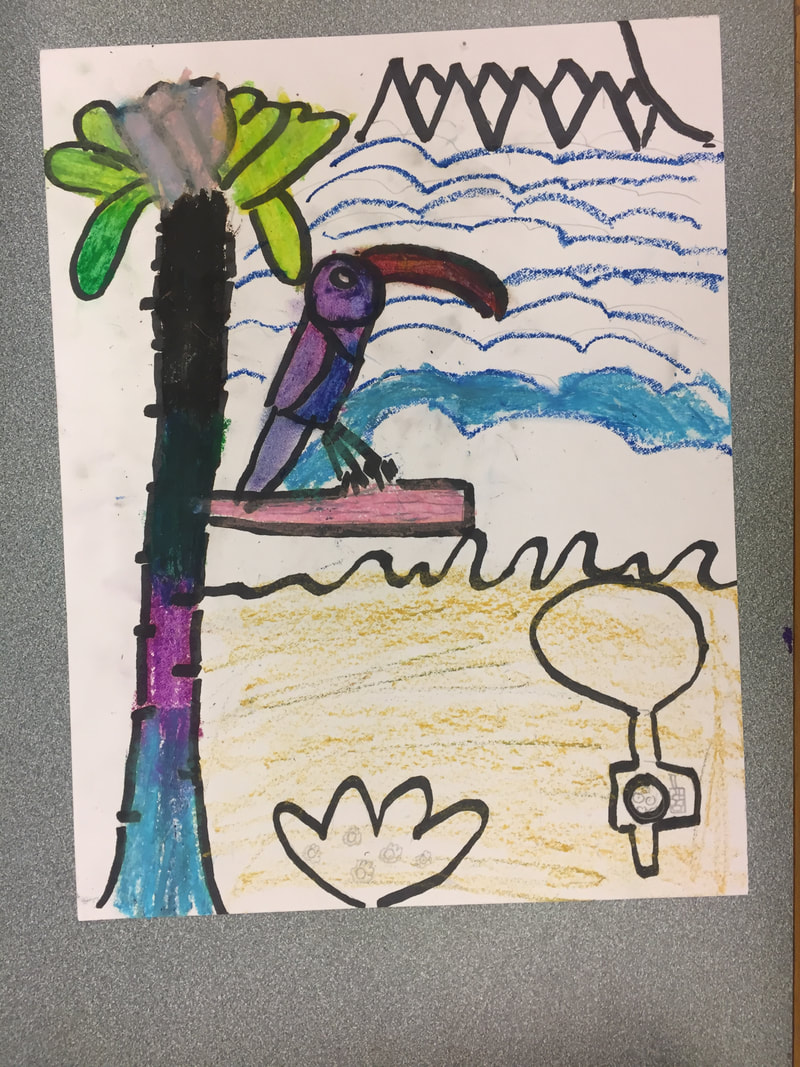
Original Works: Bold Birds
Learning Target: I can use oil pastels, watercolor, and blending to create an artwork
|


|
|
|
|
Third Class:
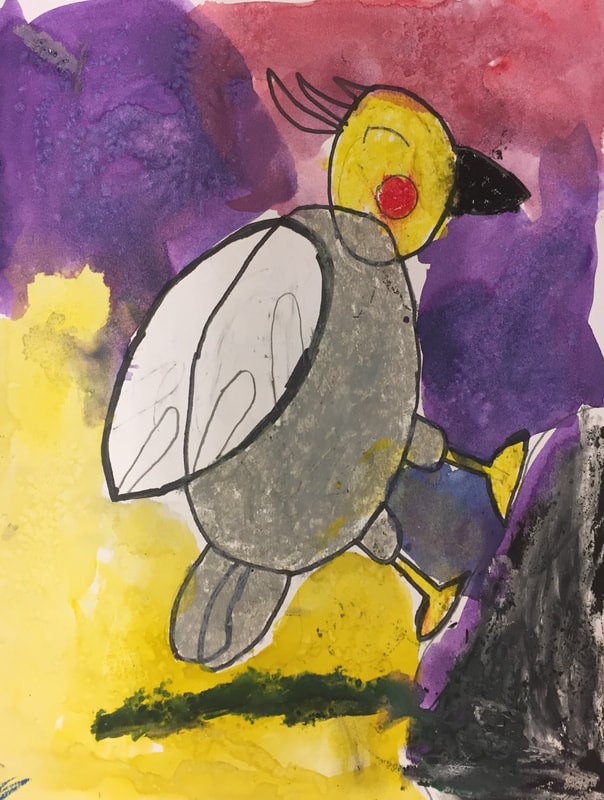
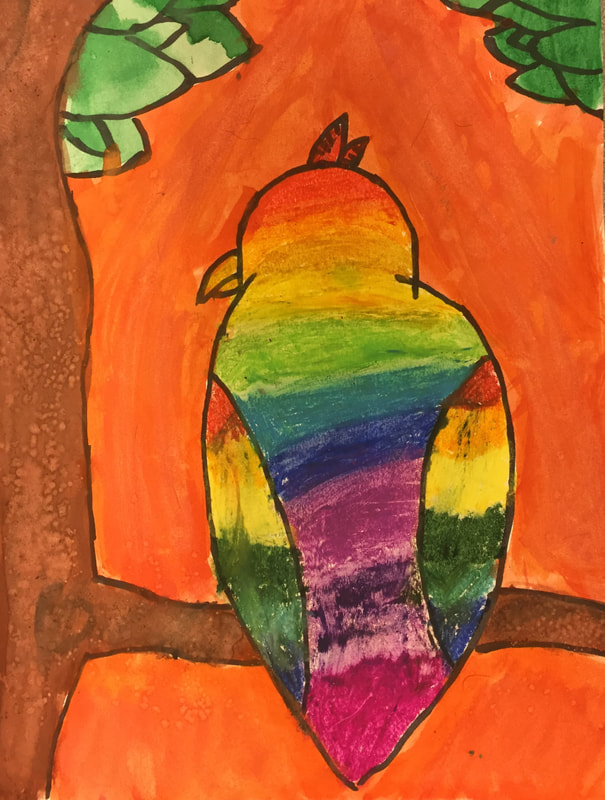
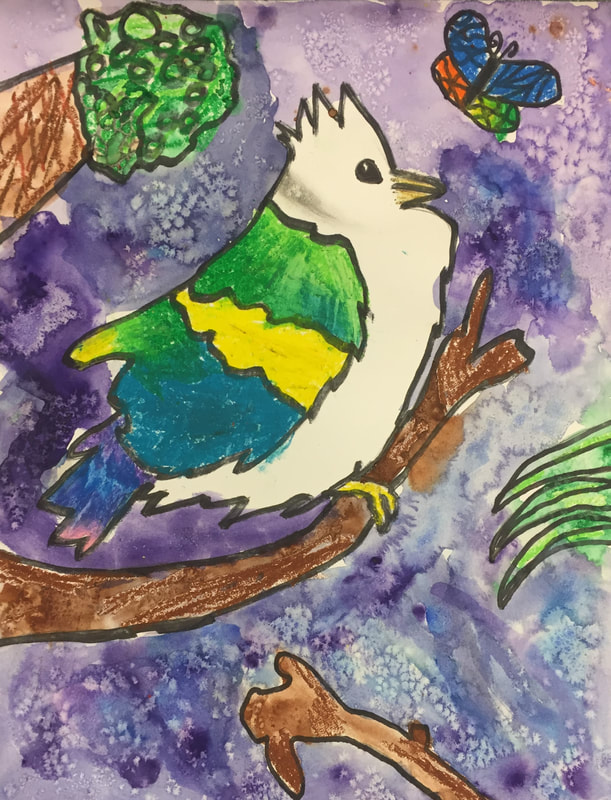
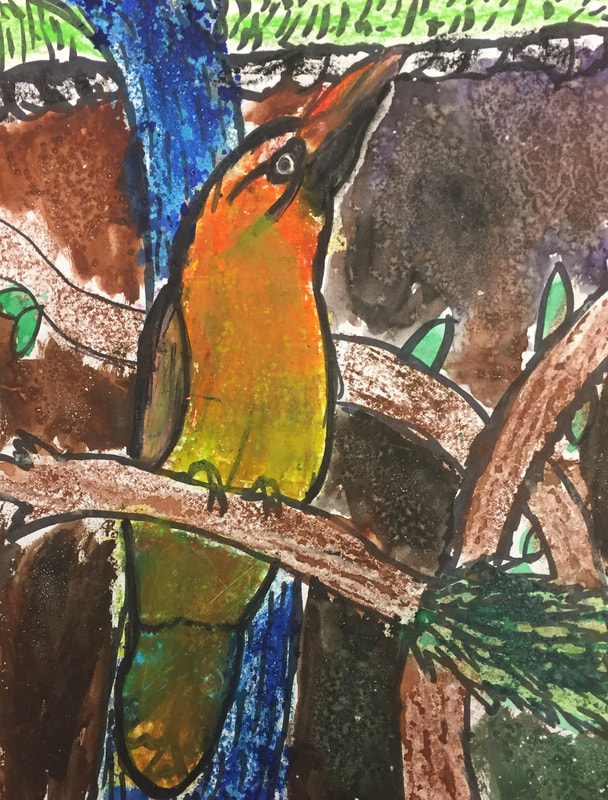
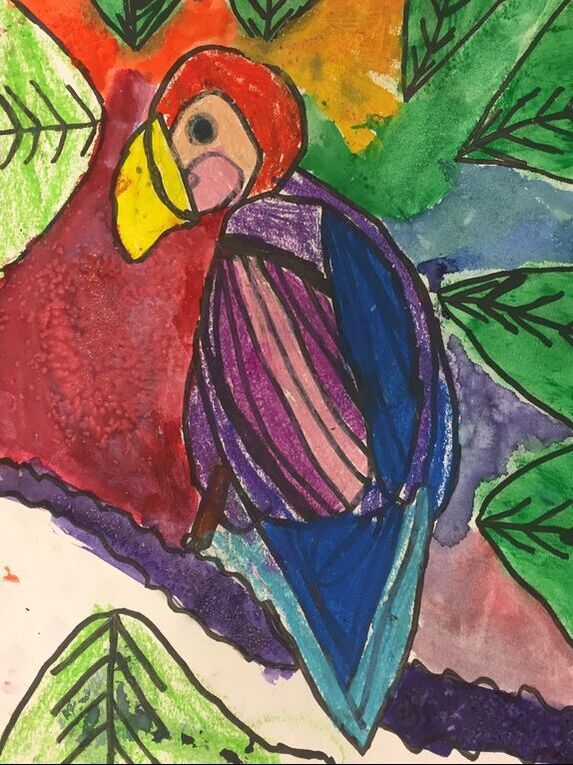
After coloring their birds with oil pastels, the fourth graders got to add watercolor to their backgrounds. They were given a quick demo on proper watercolor techniques and what happens when they interact with oil pastels. Some students also added salt to their watercolor to give their image more of a textured look. At the end of the project, the fourth graders created a colorful flock of birds. |
|
|
|
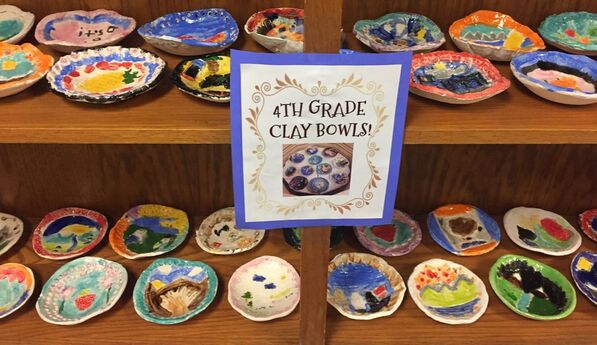
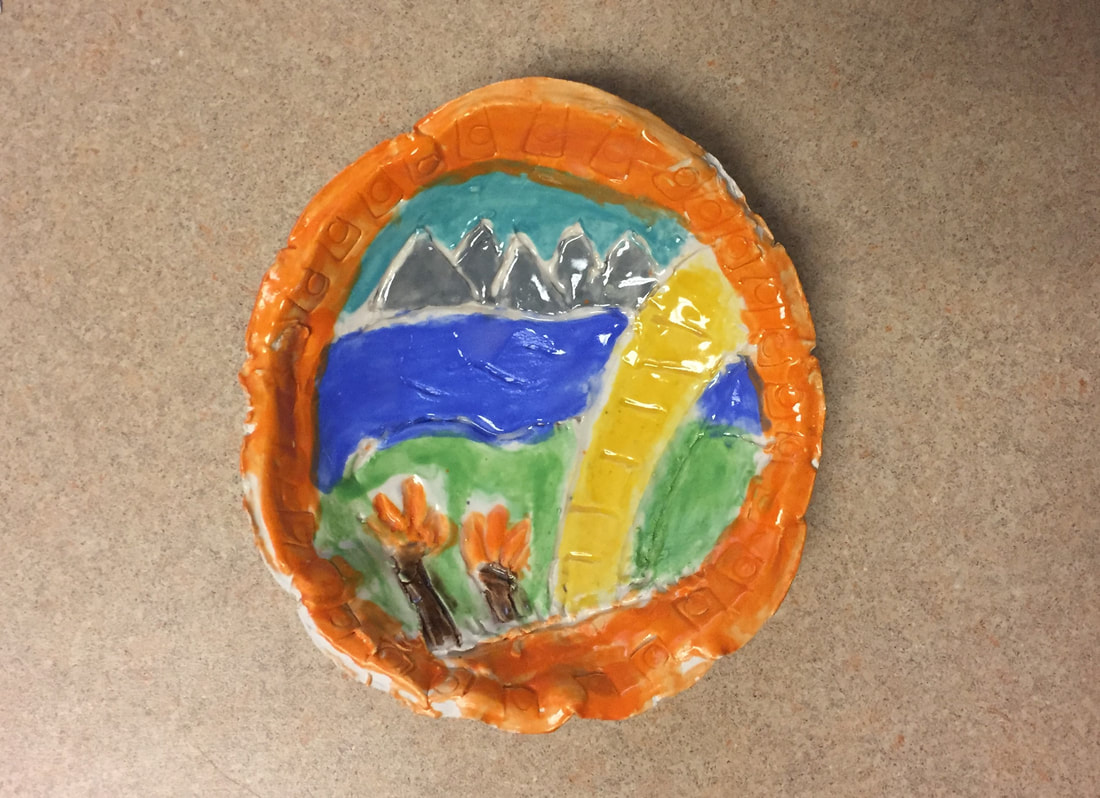
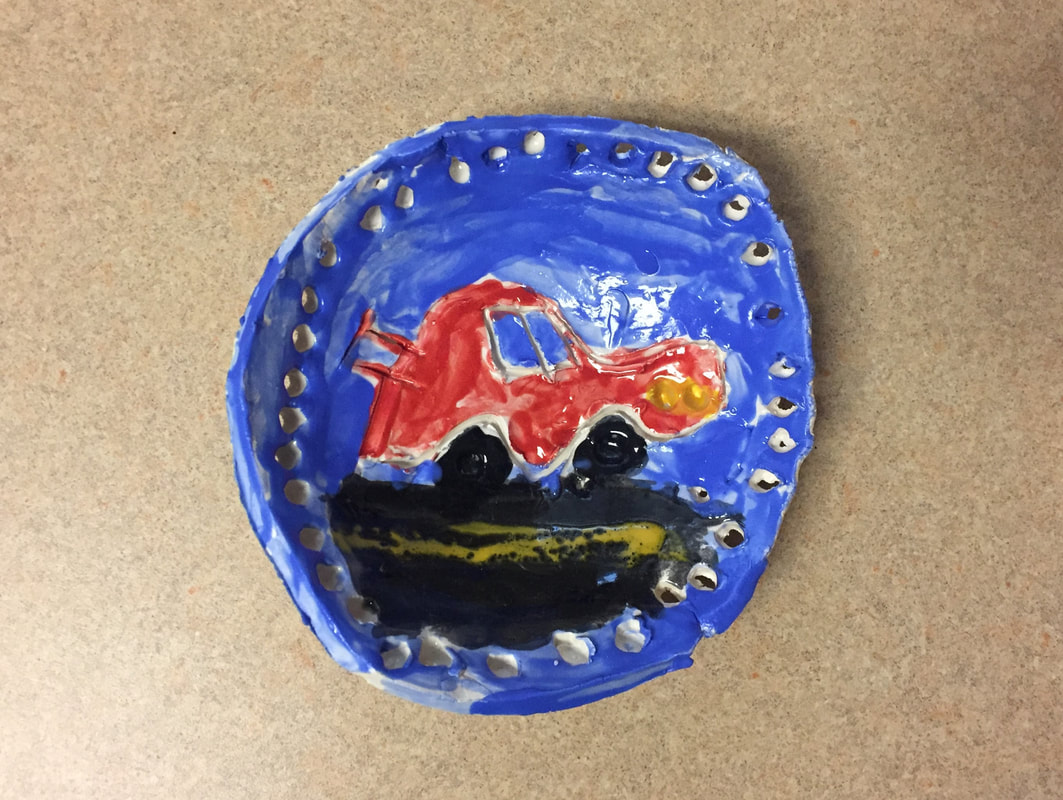
Clay Bowls
Learning Target: I can create a clay bowl that shows something about me and has a pattern on the rim!

|
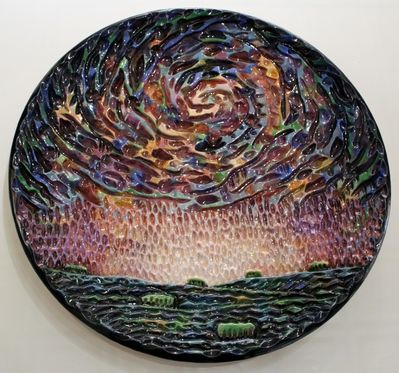
At the beginning of this lesson, students looked at the artwork of Eddie Dominguez. Dominguez is a ceramic artist who shares his passion for the American Southwest, its landscapes, and its culture through his art. Dominguez brings a rich heritage of Hispanic culture to his artworks, expressed in sculptures ranging from deconstructed vessels, dinnerware, and other household objects, as well as large scale work.
|
|
|
|
First and Second Lesson:
The fourth graders began their clay bowl project by sketching out their ideas to add to their sketchbooks. Before beginning, the students discussed what a pattern was and how they could show it in their artwork. After sketching their ideas in their sketchbook page, the fourth graders started to think about the colors they may use once the clay was fired. The second class, students each received a ball of clay. After a short demo, they rolled their clay out into a circle and were given a variety of tools to draw into their clay using the subtractive process. |


|
Third Class:
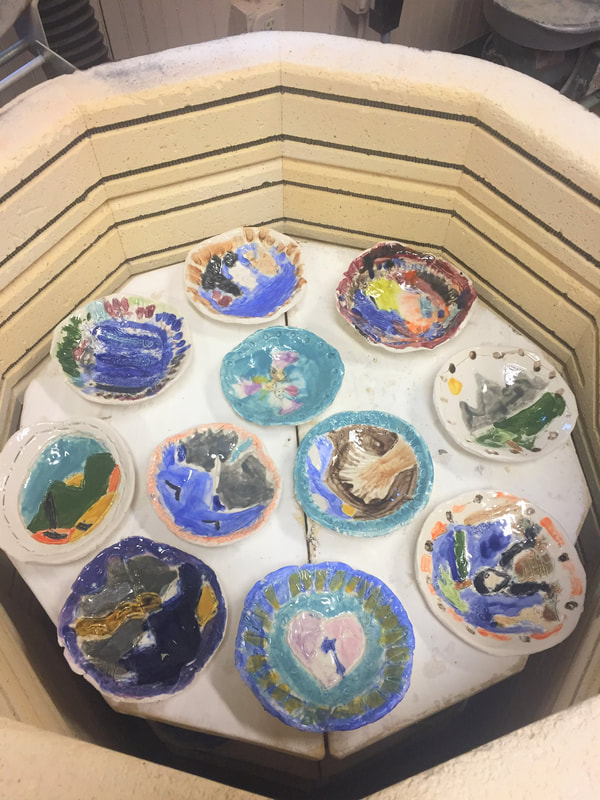
After the bowls were bisque fired, the fourth graders were able to glaze them. Before starting, we talked about what glaze is and how it colors the bowl and turns to glass once fired. Each table had several glaze colors set out and students carried their bowls around and painted their designs with the different colors of glaze. After the fourth graders finished glazing, the bowls were set out to dry, a clear coat was applied to any open areas, and they were loaded in the kiln for one last firing. |
|


|
After the last firing the bowls were unloaded from the kiln and set up in the hallway for the rest of the students in the school to enjoy before taking them home.
|
|
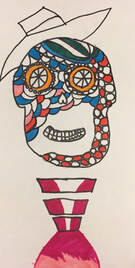
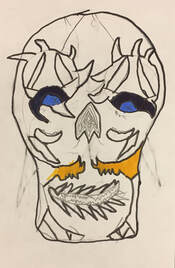
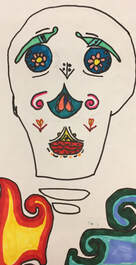
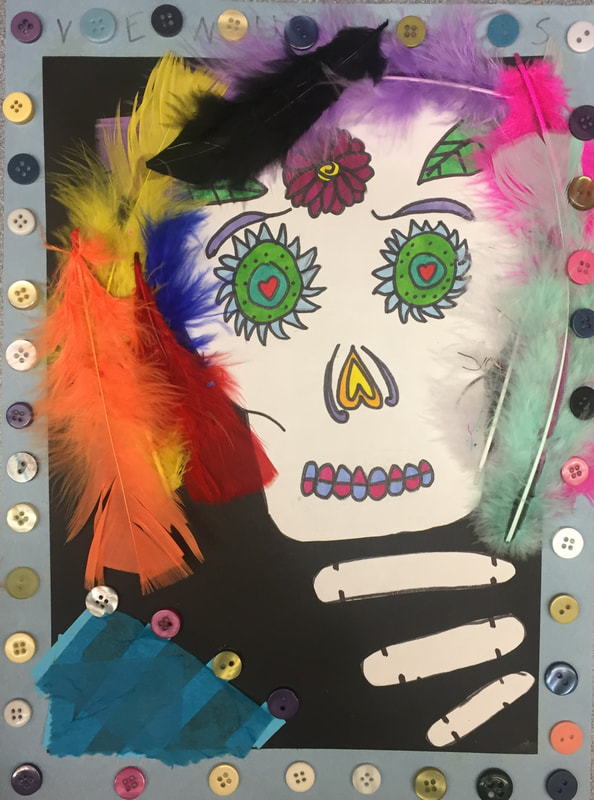
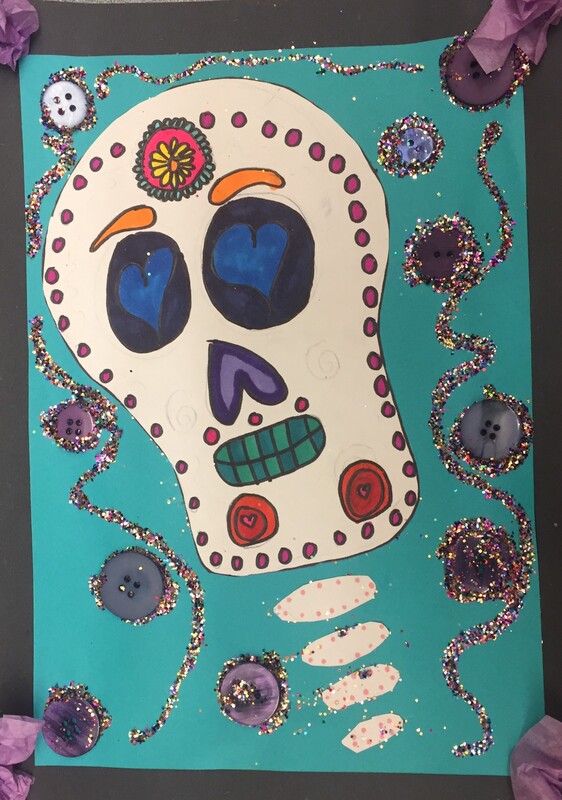
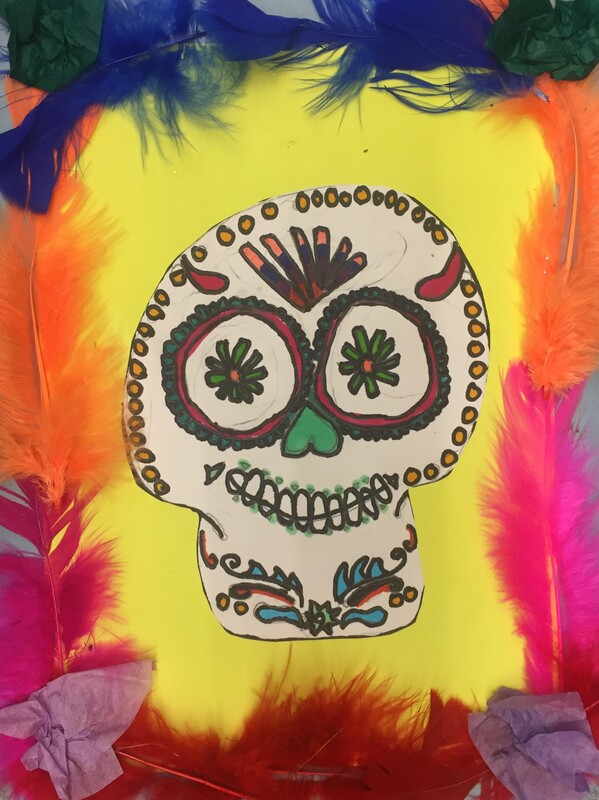
Dia De Los Muertos
Learning Target: I can create a sugar skull that shows pattern and symmetry.
|
|
|
First and Second Class:
The fourth graders learned a bit about Dia De Los Muertos by creating their own sugar skulls. They discussed what they saw while looking at some examples and discussed the pattern and symmetry that was such a big part of the sugar skull designs. The students sketched and outlined their designs and then colored their sugar skull details using colored sharpies. |
|
Third Class:
For the third class, the students got to explore different found objects to decorate their sugar skulls. They started by cutting out their skulls and gluing them onto colored paper. Next students could chose from feathers, buttons, ribbon, tissue paper, and glitter to add to their artwork. |
|
|
|
Watercolor Winter Landscapes
Learning Target: I can create a winter landscape using watercolor techniques and contour lines to show depth.

|
The fourth graders looked at the artwork of Jen Aranyi. She is a contemporary artist working as a graphic designer, illustrator, and photographer. Her artwork we looked at for this project showed brightly colored, nature inspired art. |
|
|
|
First Class:
The fourth graders took on a different composition by crating an artwork inside the shape of a circle. They began by discussing the differences between fore, middle, and background and picking them out in different examples from famous artworks. they also discussed what a horizon line and where that is seen in art. Next students decided where to have their horizon line be and drew in mountains. The students revisited watercolor techniques and how to improve their skills with blending colors and working correctly with the medium. In creating their skies, the students also used salt to give a more atmospheric/galaxy like illusion. |


|
Second Class: The next class the fourth graders discussed some art vocab for the second half of the project. They looked at how contour drawing just involves black and white lines without value. Depth and space were also discussed. They looked at how things in the foreground or middleground are larger than things in the background and by following this rule they can show depth in their own artwork. After the discussion, students drew their winter landscape using contour lines and trying to portray depth and space in their scene. Students could decide what to put in their landscape including trees, rivers, roads, even animal prints. The last step of the project involved adding stars to the sky. Students used toothpicks and gold, white, or silver paint to add starts to their landscapes skies. |
|


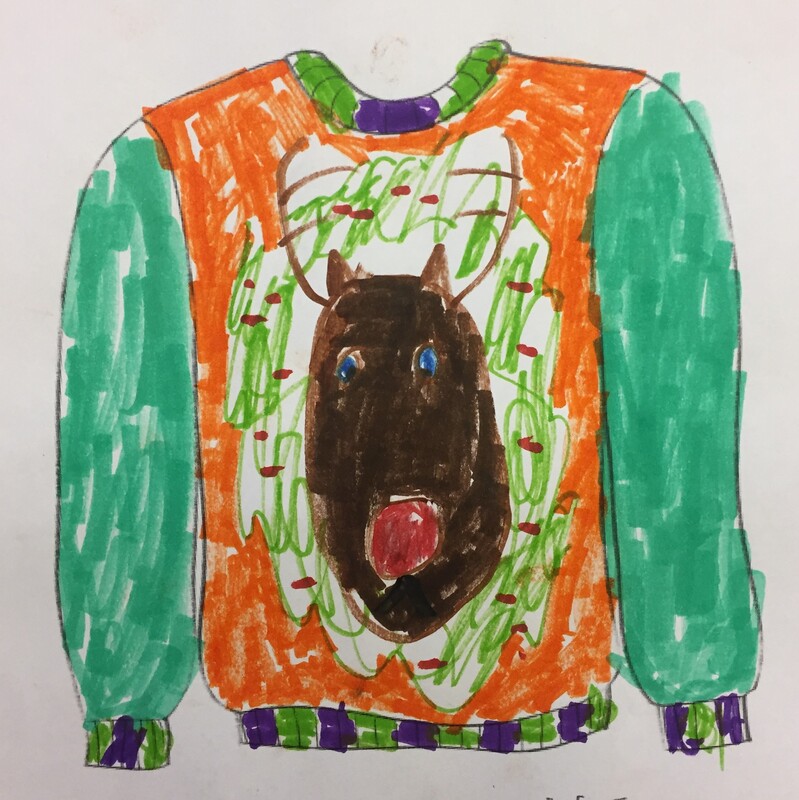
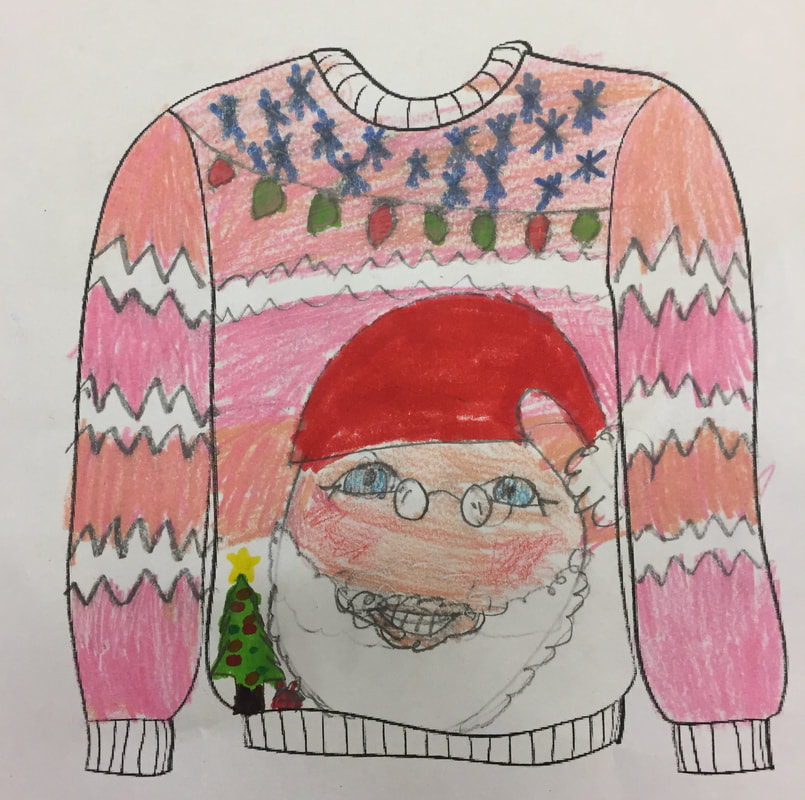
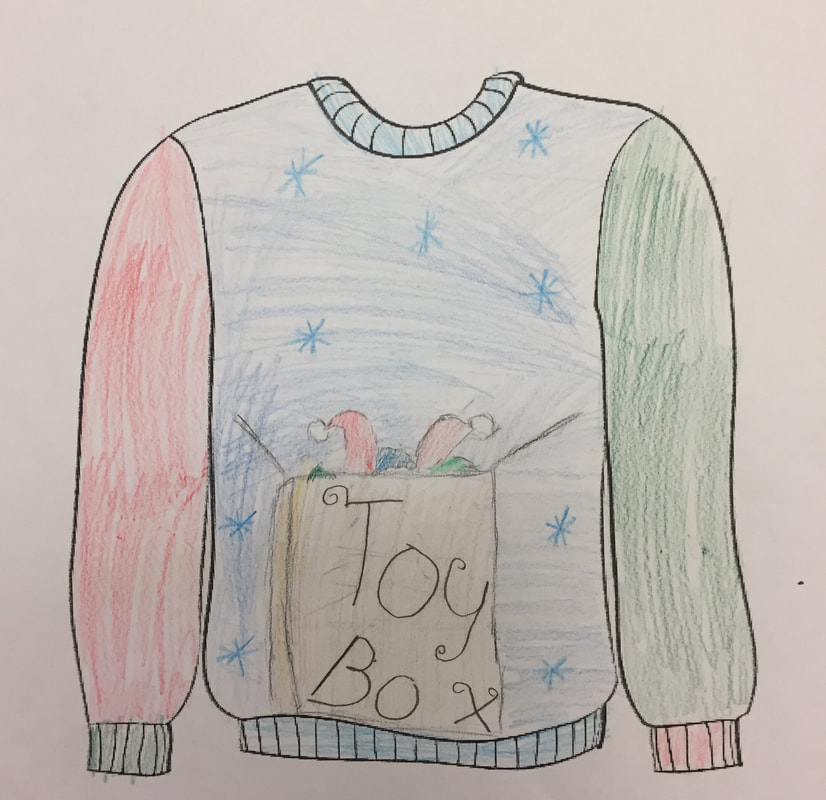
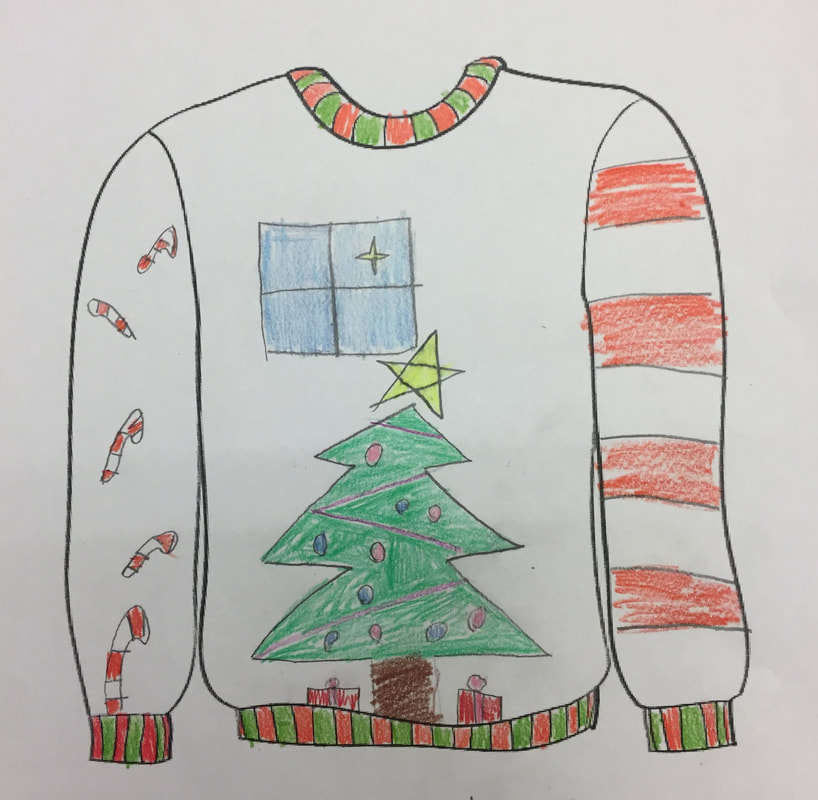
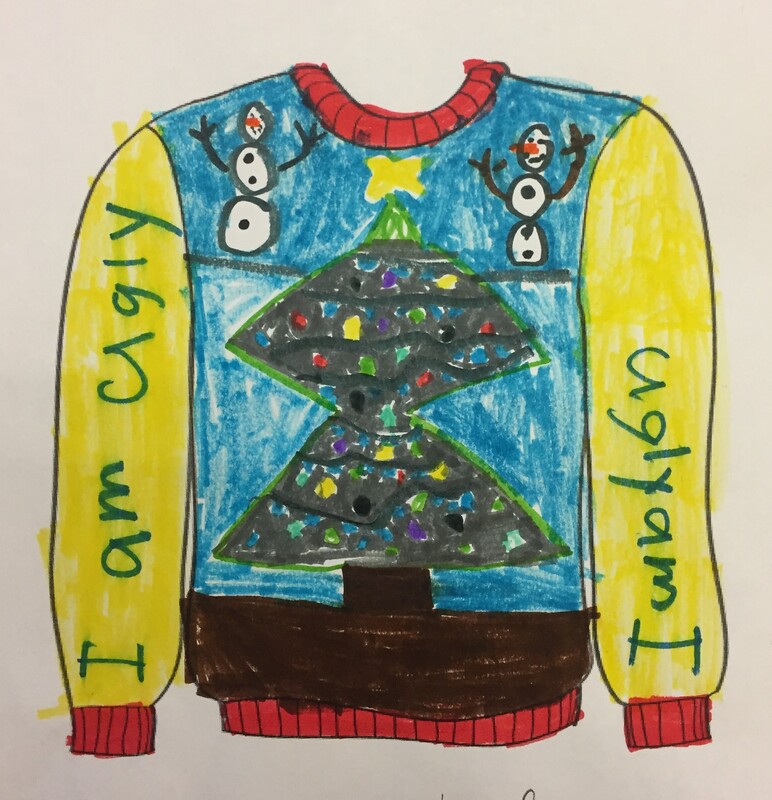
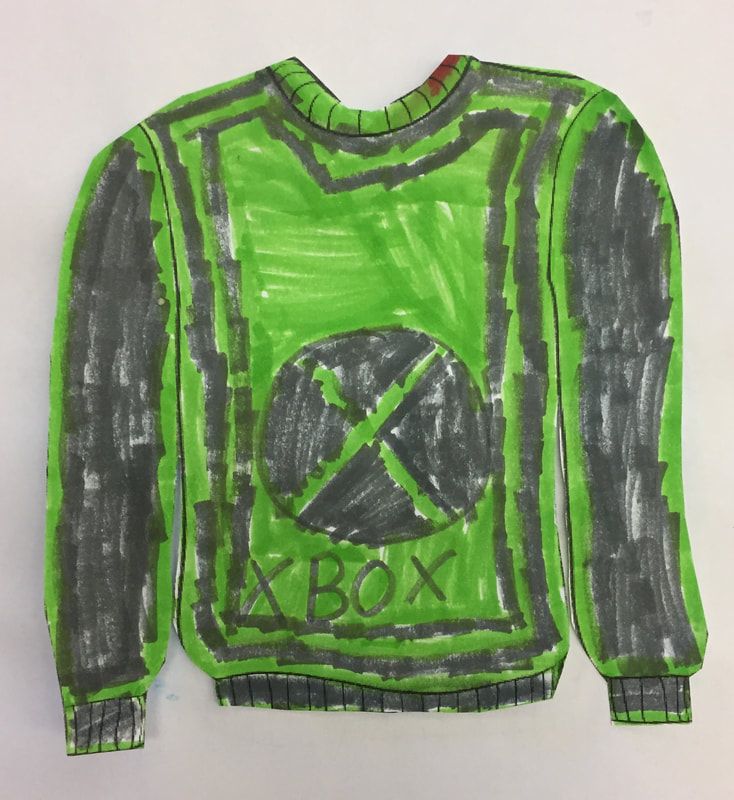
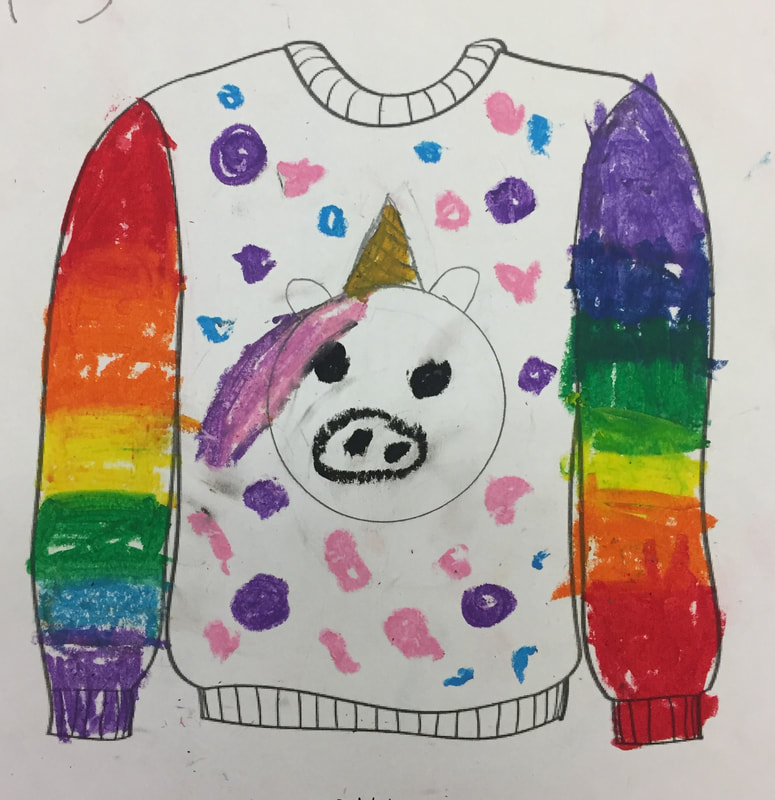
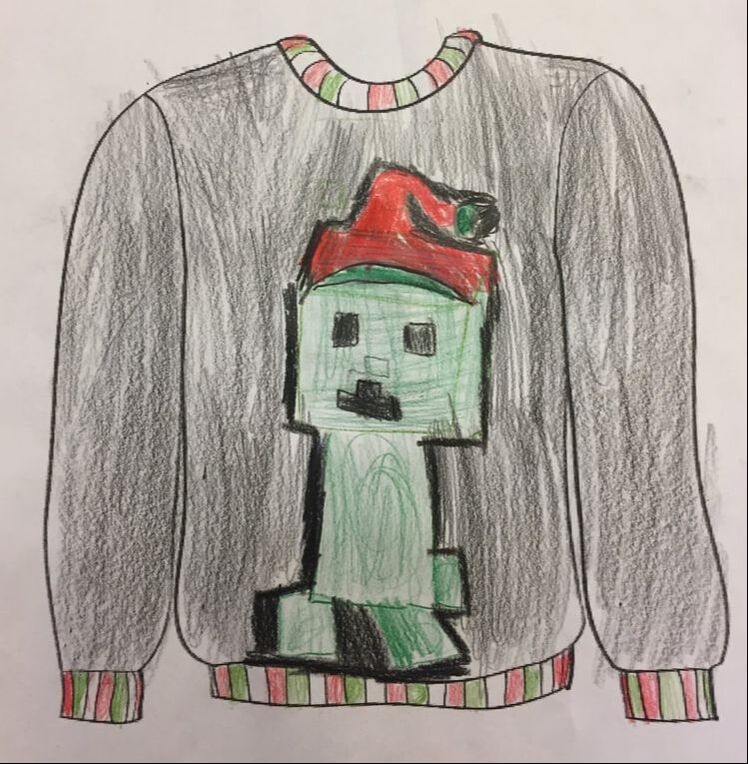
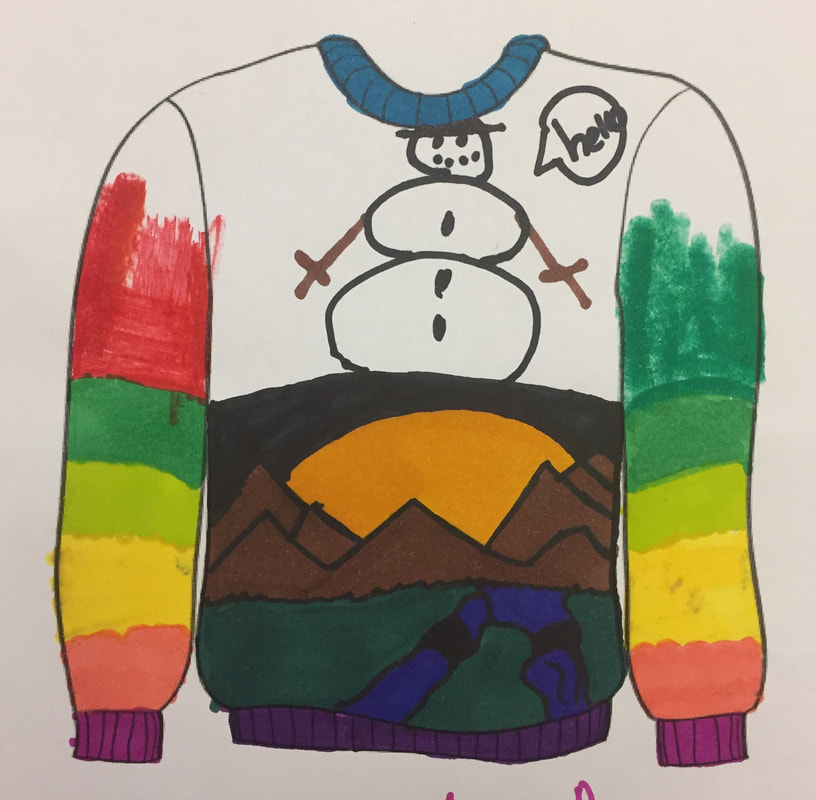
Ugly Sweaters!
Learning Target: I can create my own ugly sweater design
For this quick lesson before break, the fourth graders designed their own ugly sweater! They came up with some pretty fun designs!
|
|
|
|
|
|
|
|
|

|
One Point Perspective Landscapes
Learning Target: I can create a landscape image in one point perspective
|
|
First Class: To begin this project, the fourth graders learned some art terms associated with one point perspective.The students learned what a vanishing point was, a horizon line, and discussed what landscapes look like. after a demo on how they would create one point perspective drawings, the students were given rulers and able to create their own landscapes. We started with pencil first so that they were able to use the rulers to draw lines to the vanishing point to keep the objects in their scenes proportionate. |


|
Second and Third Class: After the students had their scenes laid out, they outlined their drawing in black marker and erased the lines back to their vanishing point not needed. After their drawing was outlined, the students learned about some different color pencil techniques. they discussed and saw examples of burnishing, blending, layering, and varied pressure. From here they were able to begin adding color to their perspective landscapes. |
|


Final Classes:
During the final classes of the fourth graders one point perspective landscapes, they continued to add color while trying to practice some of the color pencil techniques we discussed and focusing on their coloring craftsmanship.
During the final classes of the fourth graders one point perspective landscapes, they continued to add color while trying to practice some of the color pencil techniques we discussed and focusing on their coloring craftsmanship.


Paper Birds
Learning Target: I can create a three dimensional bird by assembling strips of paper
|
|
First Class: This project was meant to let the students explore and problem solve how they would create the kind of bird they wanted to make. We started the class with a quick demo of materials and some tricks and tips to get them started and then they were encouraged to play and see what they could build with the paper strips. The students were able to explore different methods of building with paper for this first class that they could continue on for the next week, or start from scratch. |


Second Class:
The next and last class, the students picked up from last week and continued creating. Some students start new, added more details to their previous bird, made a little bird family, or added a background.
The next and last class, the students picked up from last week and continued creating. Some students start new, added more details to their previous bird, made a little bird family, or added a background.


