Original Works Project: Fabulous Fish!
Learning Target: I can create an underwater artwork that shows space using overlapping and a border
|
First and Second Class:
In the first and second class of this lesson, the second graders talked about what a border is and how it can be used in artwork. They also discussed how to show depth and space in an artwork using overlapping. Students were given reference images to help them draw their fish and coral or were able to make up their own underwater scene. After finishing, they used black marker to outline their drawings. Next the students used crayons to add details and color while leaving space for the watercolor next class. They were given a demonstration on how to blend crayons to get a more three dimensional feel for their fish and make a more interesting composition. |
|


|
|
Third Class: For the third class, the second graders got to explore using watercolor and how it reacted with wax crayon. Some students even used white crayon the previous class that magically re-appeared when the watercolor was added. Students were also given the option of using salt shakers to add salt to their images when the watercolor was still wet. This created a crystal/water like texture that added to the underwater feel of some of their artwork! |


Warm and Cool Color Weaving
Learning Target: I can create a circular weaving showing warm and cool colors
|
|
|
First Class:
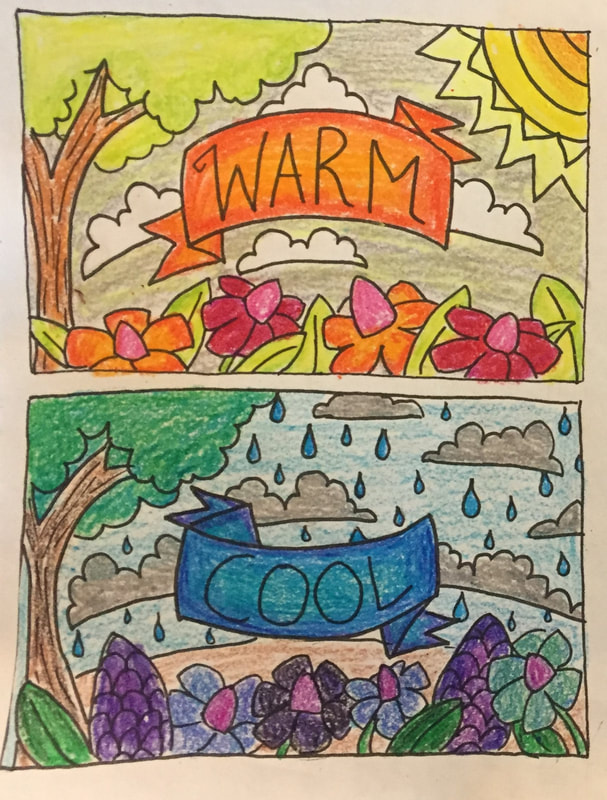
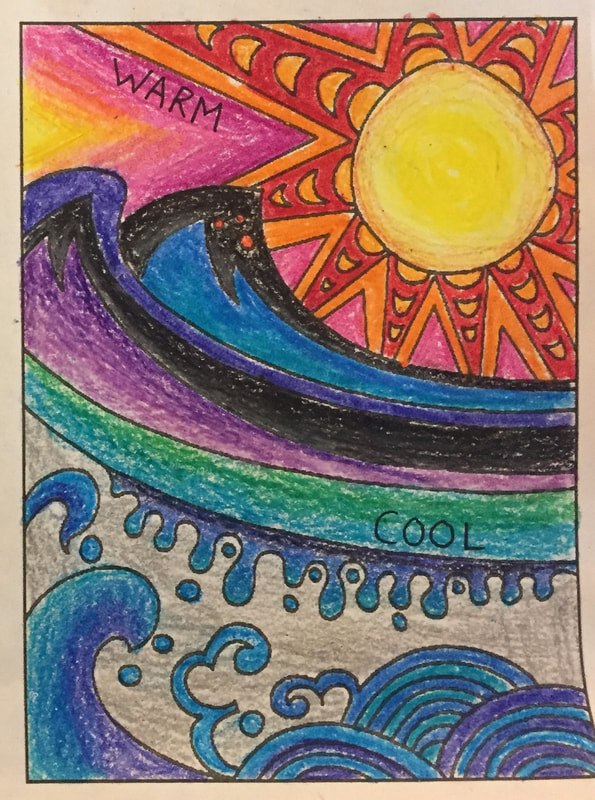
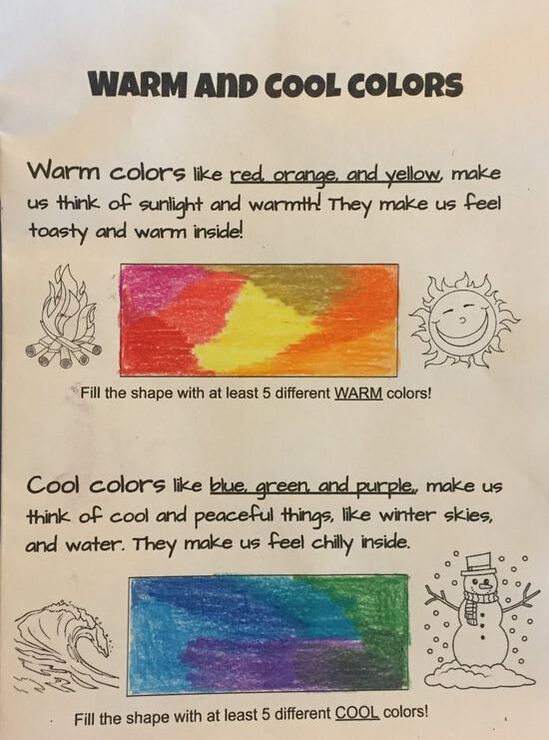
To begin this lesson, students discussed the difference between warm and cool colors and completed a few handouts to practice and add to their sketchbooks. With these exercises, students colored different handouts to show warm and cool colors by using either markers, crayons, or colored pencils. During this time students often questioned certain colors and their peers helped to determine whether the color was warm or cool, or could work for both. |
|
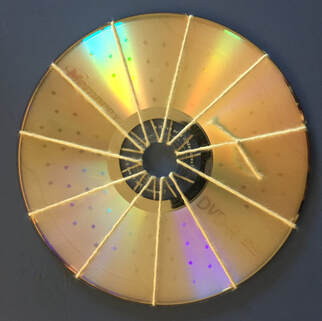
Second Class: The next class, students continued to work on their sketchbook pages and we began to learn about some weaving terms. The students learned what a loom is and how different items can be used to create a loom, ranging from a traditional loom to creating a loom out of sticks. They then learned about the warp vs weft strings in weaving and how we would use both for the project. Each of the second graders were given a CD with their name and shown how the weft was strung to begin their weaving project. |
|
|
|
Next Few Weeks of Classes: Over the course of the next few weeks the second graders got really into their weavings and continued to work hard each class. The students learned the over under pattern for traditional weaving and used small plastic needles to follow this pattern on the strings of the CD's. Each student chose to start with either their warm or cool side first and then had to continue to use strings that fell into that color family. Once finished with one side, they could begin the other. |


|
Last Classes:
The students were able to choose from a variety of yarn colors and types as they continued to add more string. Mrs. Bello helped with knot tying from the beginning, but as the weeks continued and the weavings grew, many students began learning how to tie knots on their own! They did a great job deciding which strings to use to continue weaving either their warm or cool side of their CD. As the second graders finished up their weavings, the final strings were tied off and the students poked the loose ends from adding strings into their weaving to hide them. The warm and cool color weavings were hung in the windows of the learning center for all the students to enjoy! |
|


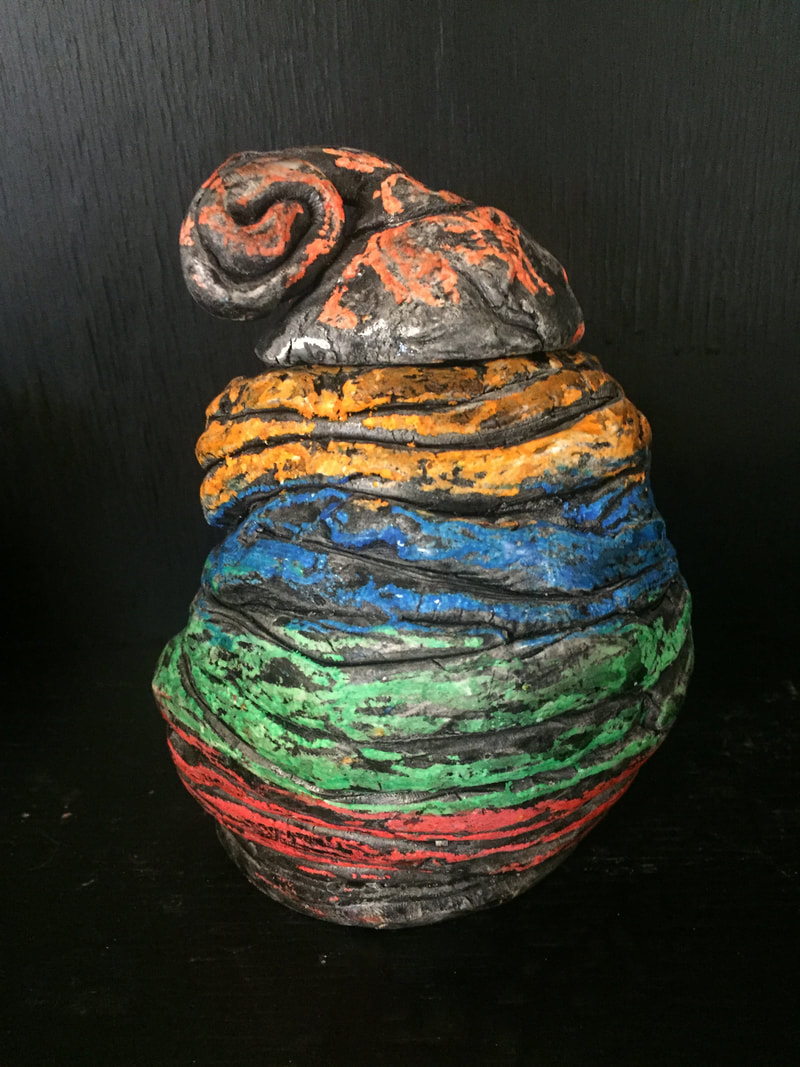
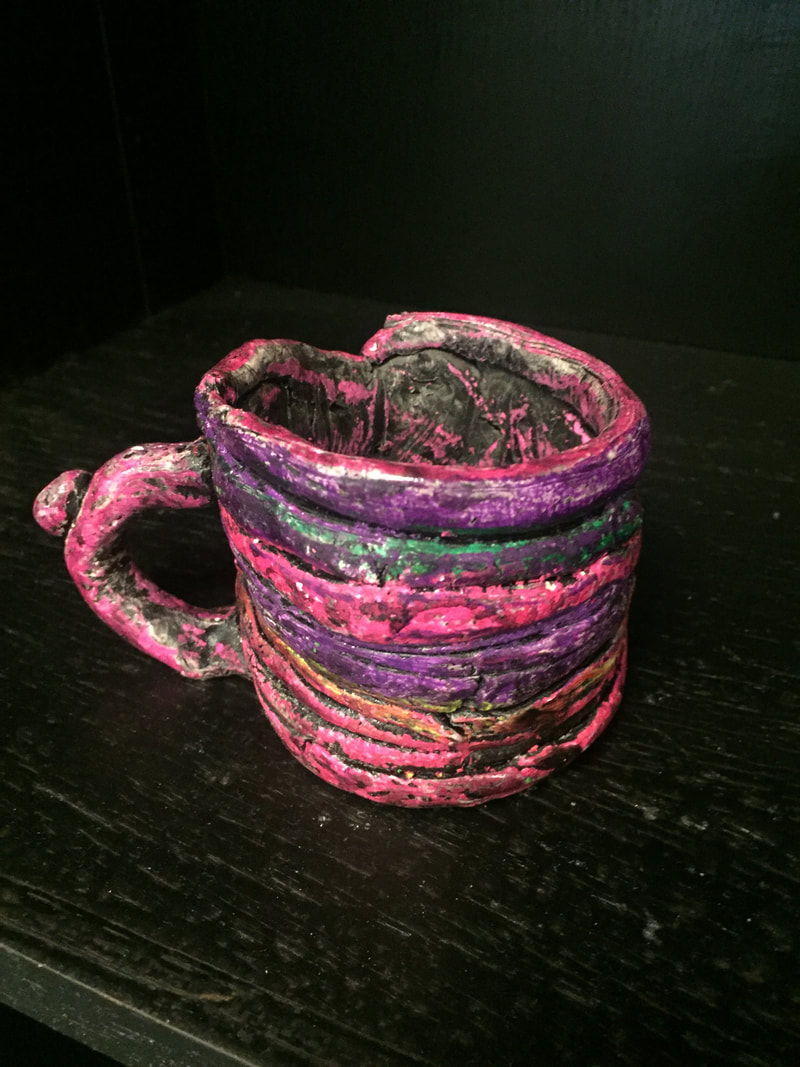
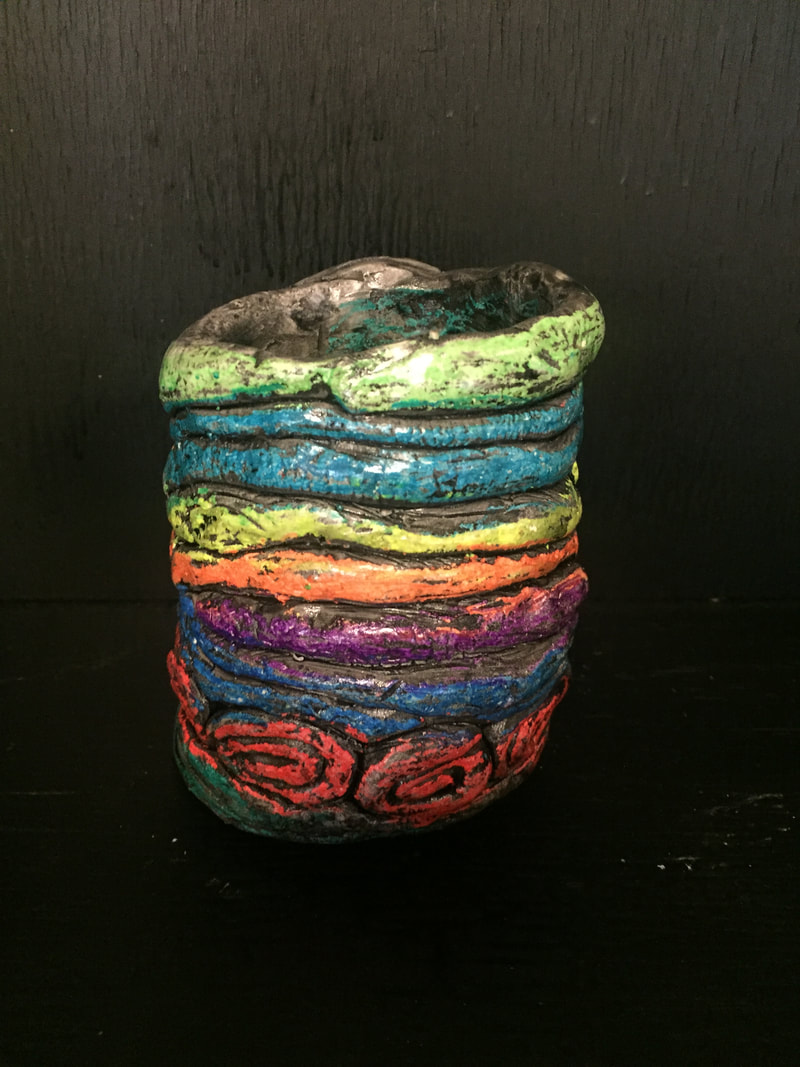
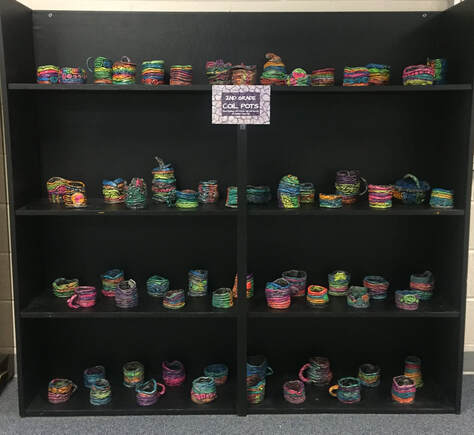
Coil Pots
Learning Target: I can create a clay coil pot using handbuilding techniques
|
|
First Class: To begin the second graders clay project, we talked about what clay was and where it comes from. Students looked at how different cultures use clay and make pottery. We talked about different clay terms including handbuilding, coil, slip and score, and how we would be making our coil pots. To start each student was given a round flat piece of clay for their base. From here the students practiced rolling their coils and were shown how to incorporate different kinds of coils like spirals or curls, as well as balls or other designs. From here, the second graders began building their pots and adding their own details. |


Next Few Classes:
Over the next few classes the second graders continued to work on their coil pots. Some made theirs wider, some skinny, some short, some tall, and lots of students played with adding more decorative coils or elements to their pots similar to some of the examples from other coil pot artists that they looked at.
Over the next few classes the second graders continued to work on their coil pots. Some made theirs wider, some skinny, some short, some tall, and lots of students played with adding more decorative coils or elements to their pots similar to some of the examples from other coil pot artists that they looked at.


|
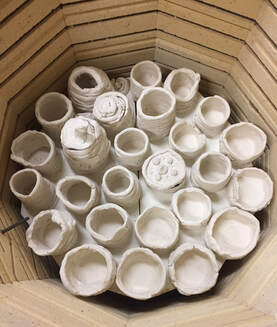
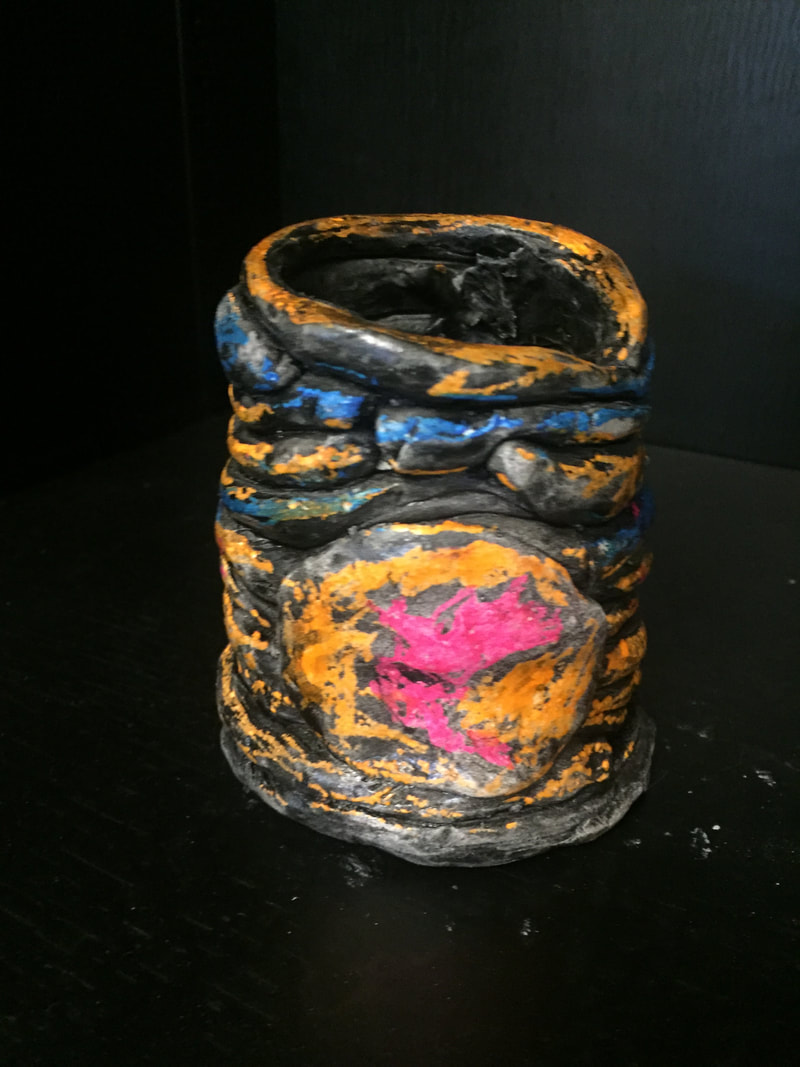
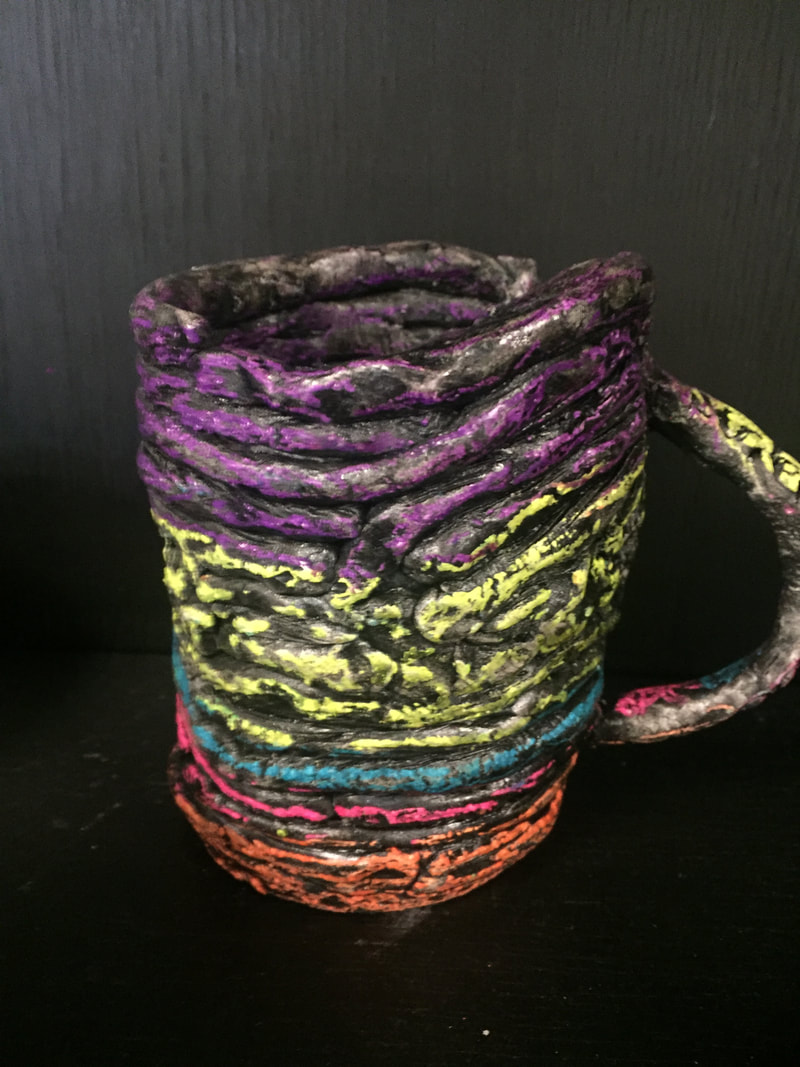
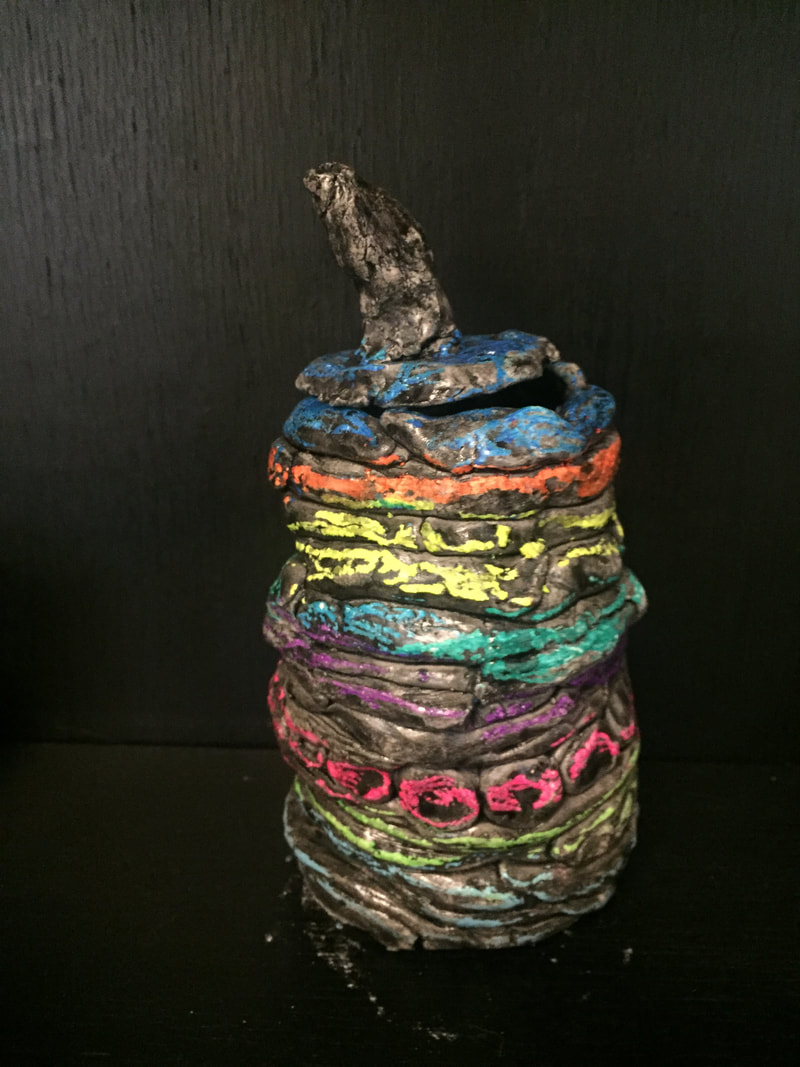
Final Class: After the students finished their coil pots, they learned about the kiln and how pottery gets fired. Once all the coil pots were fired, it was time to add some color! The students used oil pastels to decorate and draw on the outside of their coil pots. Once they were happy with their colors, their pots were dipped in watered down black paint to fill any remaining areas and make the colors pop. |
|
|
|
|
|
|
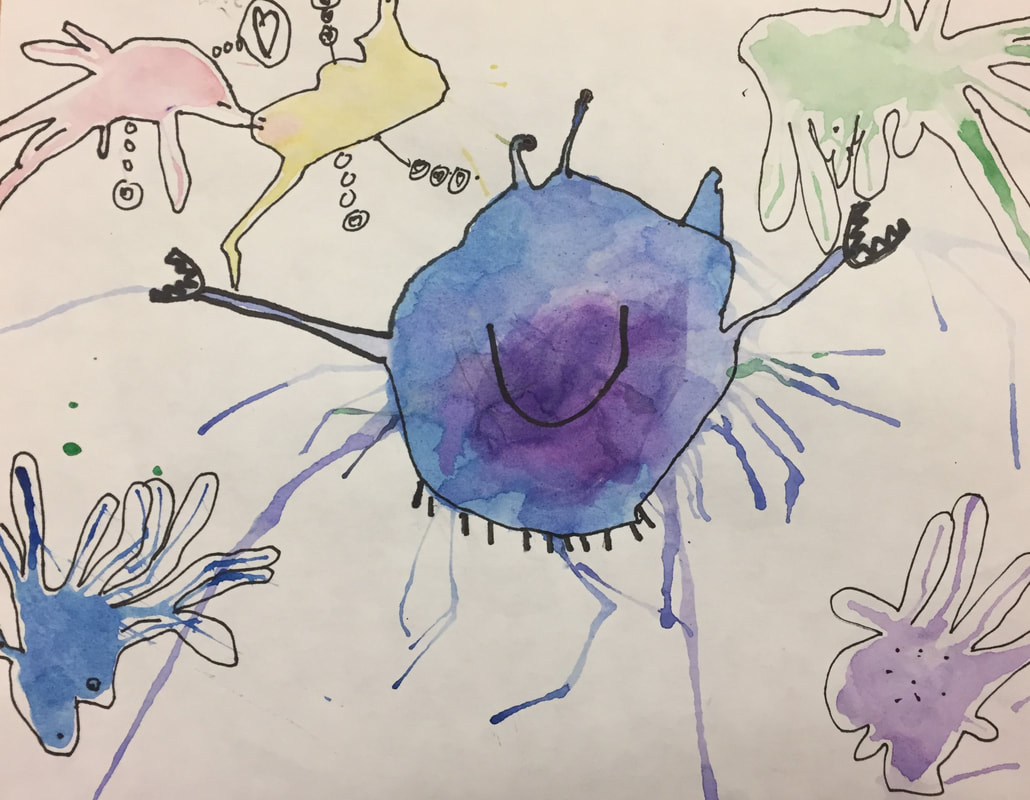
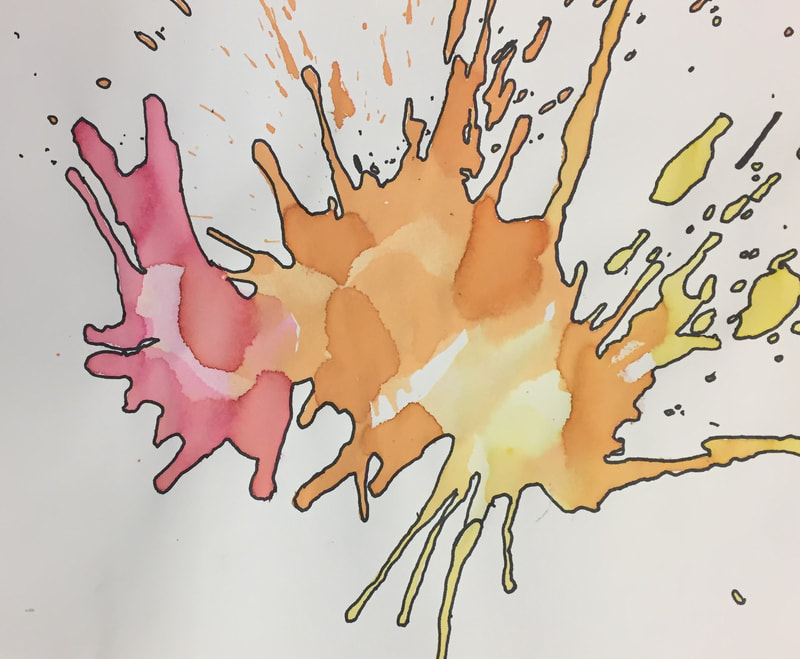
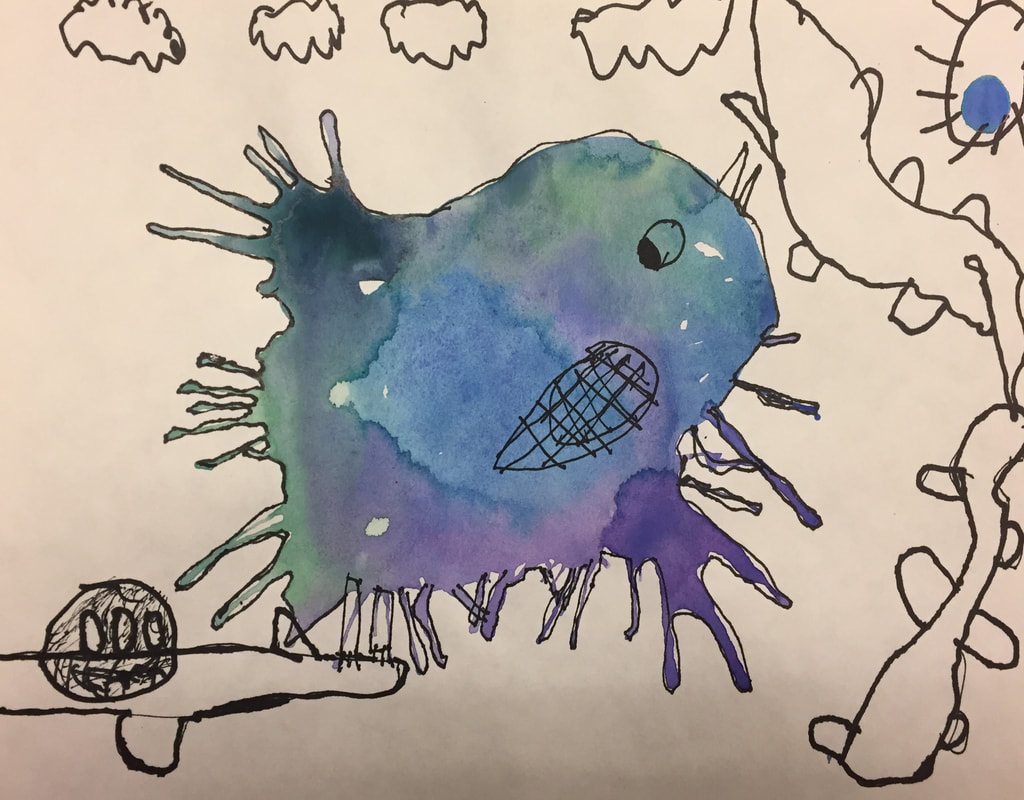
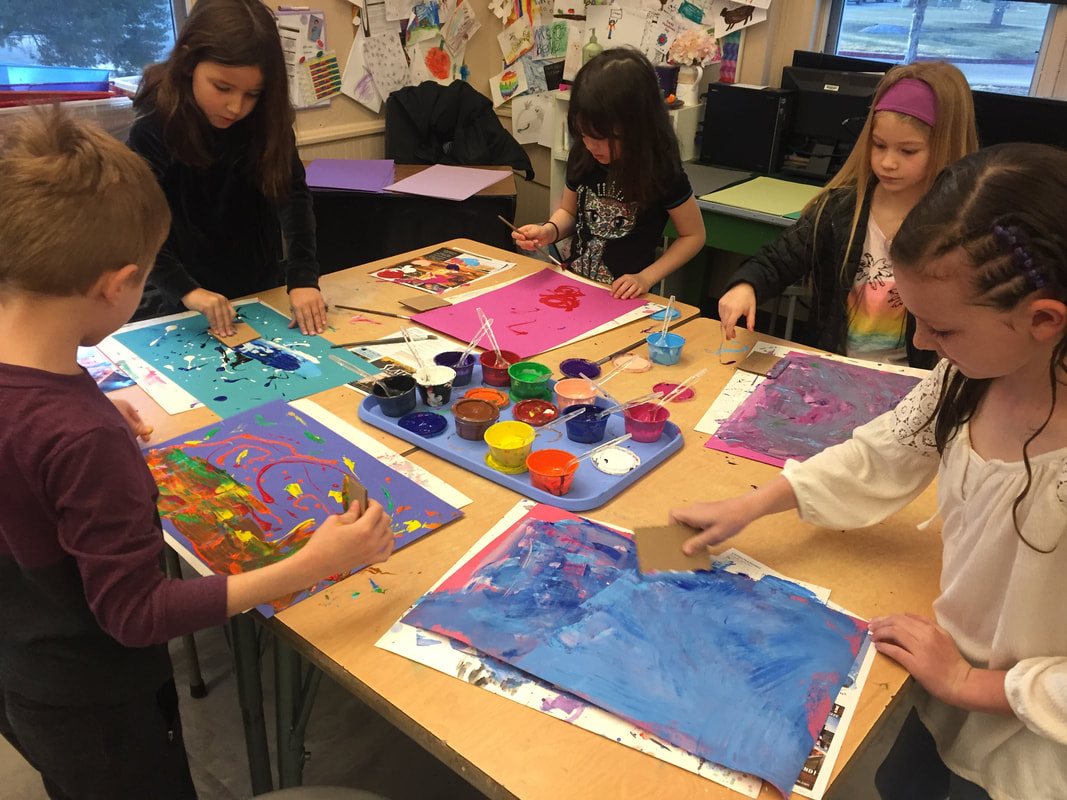
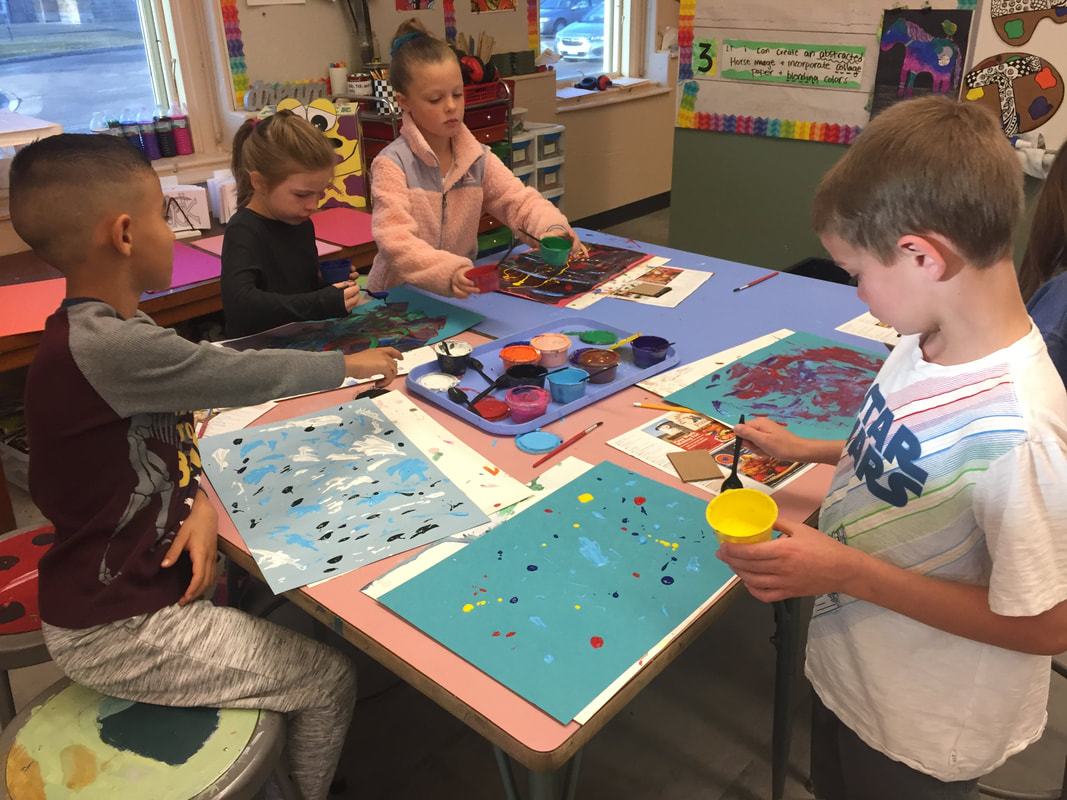
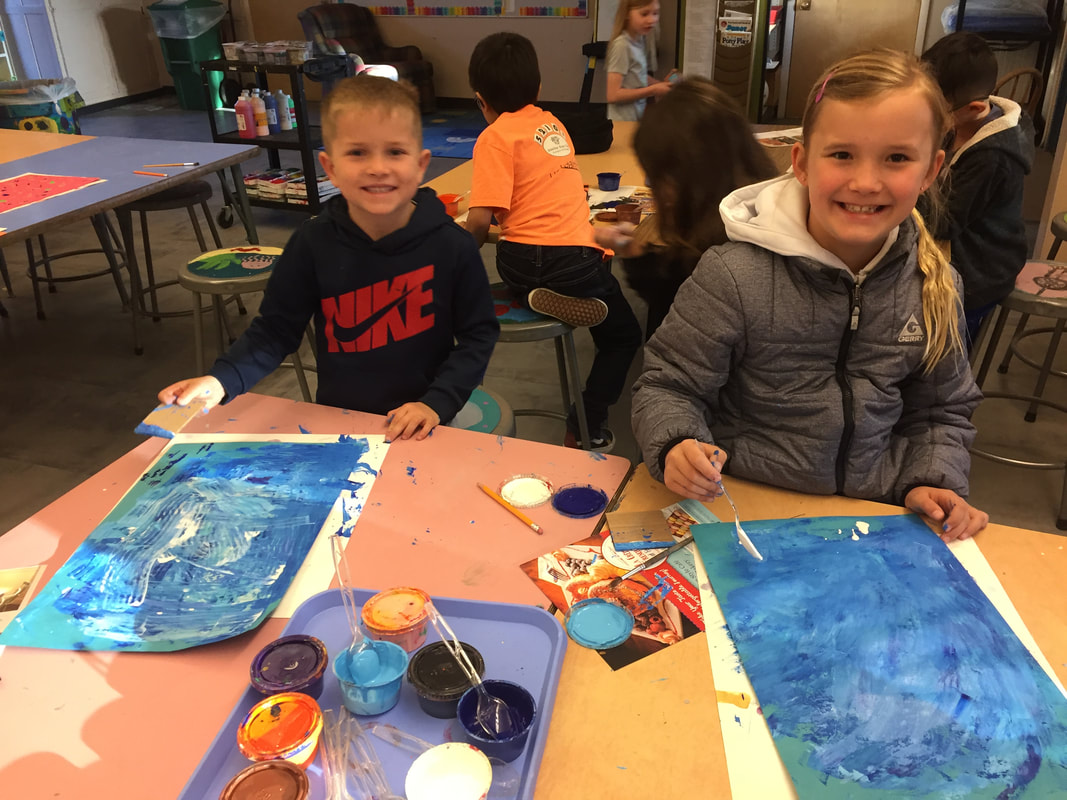
Blow Paint Creatures
Learning Target: I can make an abstract splatter paint artwork and create a creature out of it
|
First Class: For this fun project, students got to explore an unusual way of painting! Students used watercolors and straws to create blow paint images. They choose whatever colors they wanted and went for it. |
|


|

|
Second Class: Once their blow paint paintings were dry, the students used black markers to go back into their images and create something. Some made scenes, animals, people, and more! They seemed to really enjoy seeing what each other came up with. |
|
|
|
|
|
